Inside: Tips and instructions for how to make easy, foolproof watercolor tartan and plaid backgrounds for cards and other papercrafts.
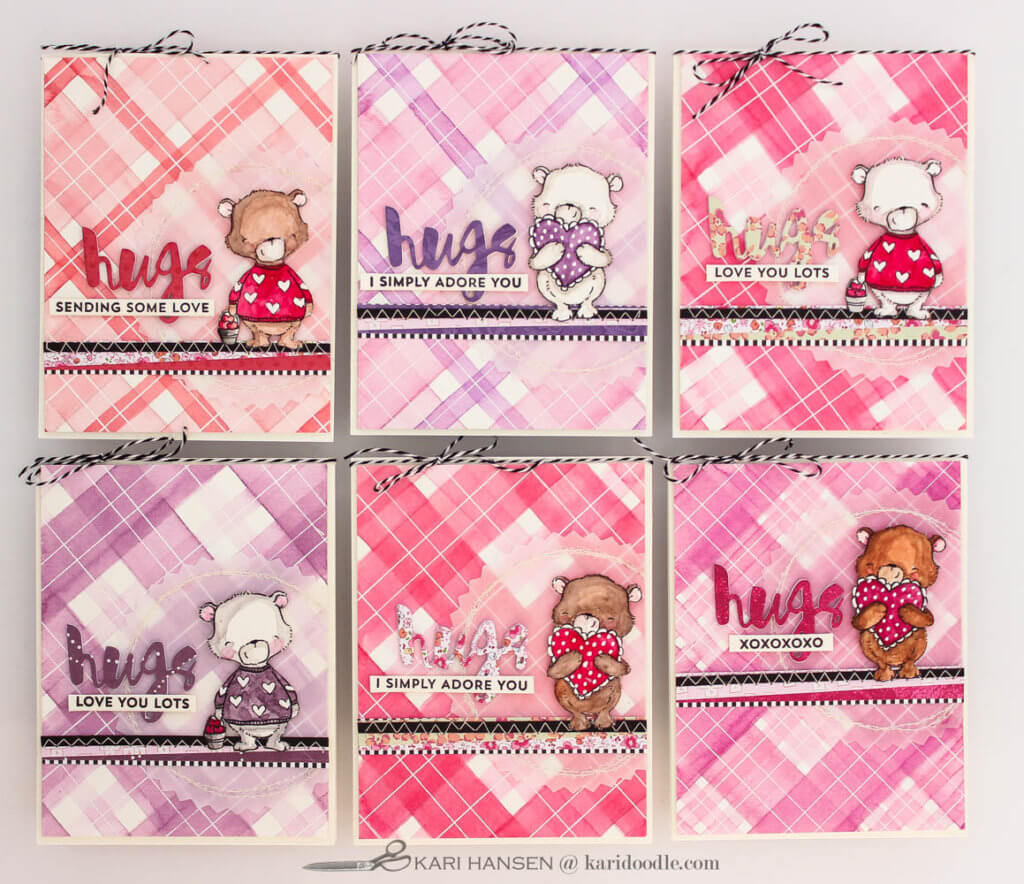
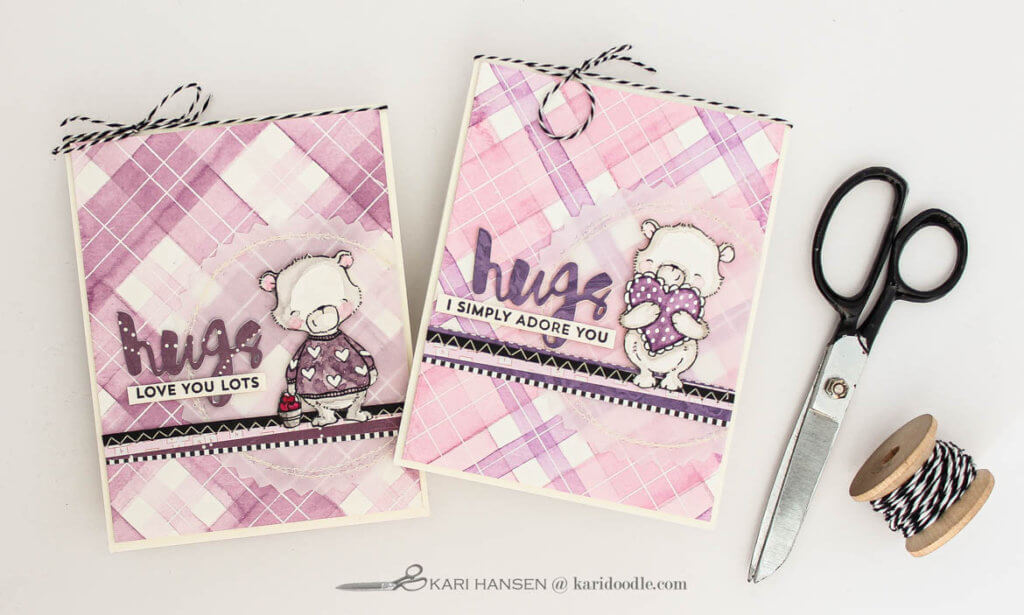
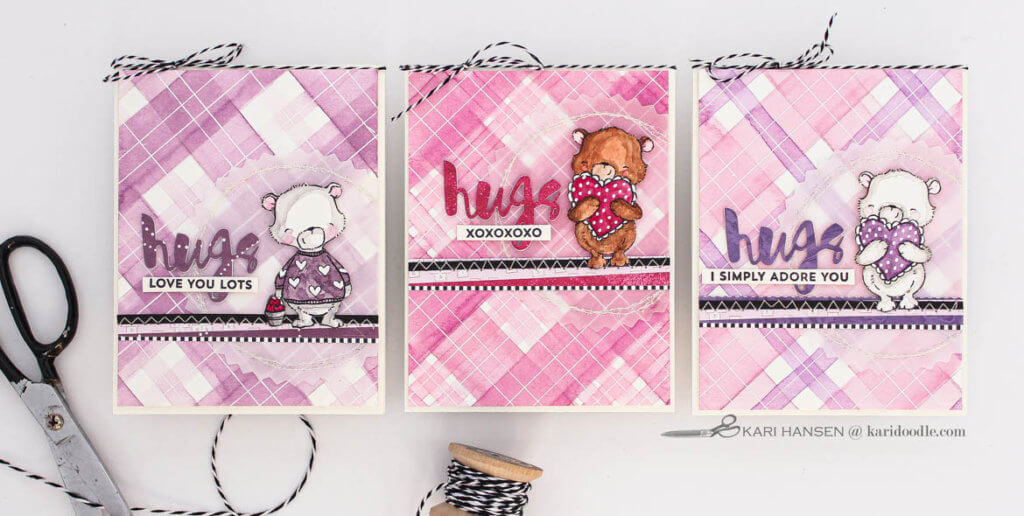
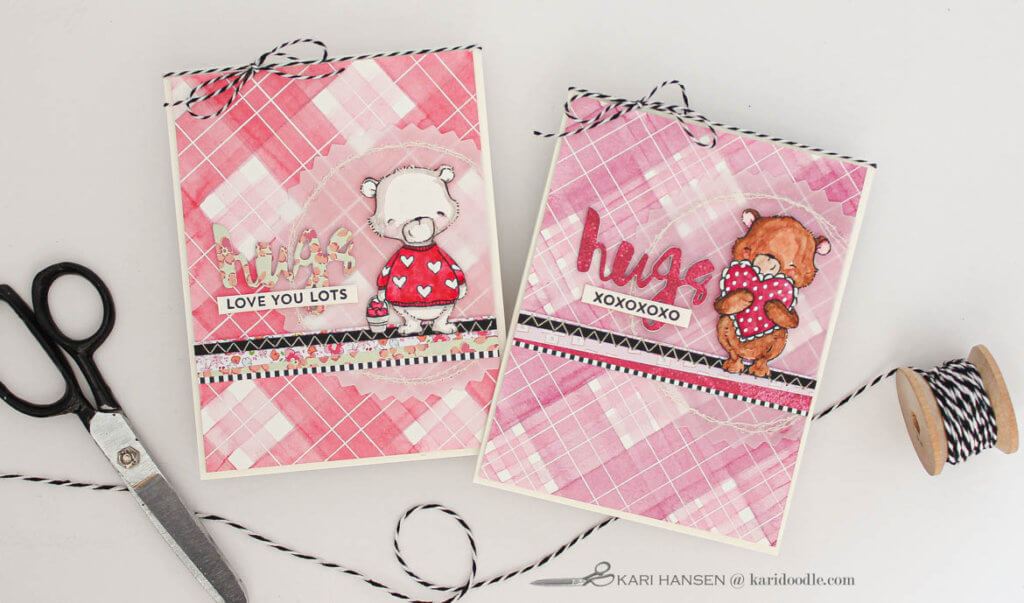
See that cute little bear fiercely hugging the polka-dot heart?
When I look upon her sweet affection, I can’t help but say: I get it, teddy girl.
The cuddly bears on these love cards understand the depth of my devotion to tartan. Tartan and me– well, we’re currently having an intense love affair.
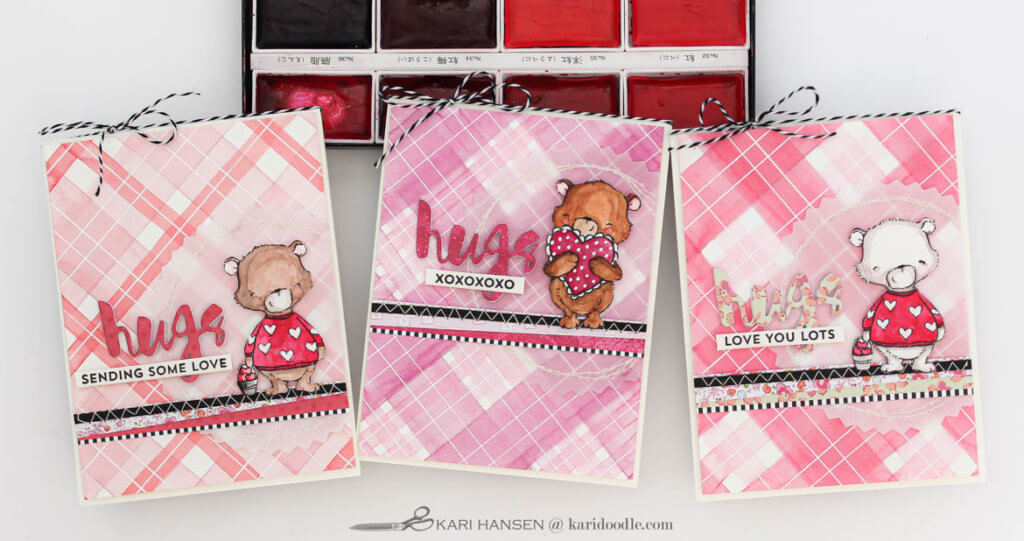
I’ve crafted dozens and dozens of handmade tartan pieces this past year or so. And like any courtship, there’s been ups and downs.
Quite a few of my attempts came out surprisingly fugly. Too many colors. Not enough variation in the stripes. Or not enough symmetry in the pattern.
But many turned out beautifully– crisp, dynamic, and balanced. Tartan eye candy.
It’s become abundantly clear that there’s a method to romancing the tartan. Of course, the Scots have ken this for centuries. So what’s the secret?
In this post:
Crafting Tartans with Watercolor
There are many techniques to make handmade tartans for papercrafting. One of my favorites is watercolor.
Watercolor works particularly well with tartan’s transecting bands. The paints’ transparent nature allows a new hue to occur at the junction of converging stripes. This effect on paper is akin to how a new color emerges at the intersection of threads in a traditionally woven tartan fabric.
As I’ve continued painting tartans in large and small scales, in all sorts of colorways, I’ve been learning why some of my handmade tartans are more successful than others. Below are the tips and good practices I’ve assembled along the way.
11 Tips for Simple, Successful Watercolor Tartans
These tips and trips will make your painting your own tartans and plaids practically foolproof, with great results when using watercolors and beyond.
#1: Orient the grid.
Diagonal lines have more dynamic movement than horizontal/vertical ones. Because of this, I tend to orient my tartans diagonally (but you really can’t go wrong in either direction). In addition, a diagonal pattern is more forgiving to work with when it comes to the panel looking plumb when added to the final project.
#2: Angle the pattern.
When starting your tartan, the stripes’ angle can be at whatever pitch looks good to you. The diagonals don’t have to go from corner to corner at a sharp 45-degree angle. Experiment with a softer angle too, such as 30 to 35-degrees. (But no worries—you don’t need a protractor. Just eyeball it!)
#3: Pencil in guidelines.
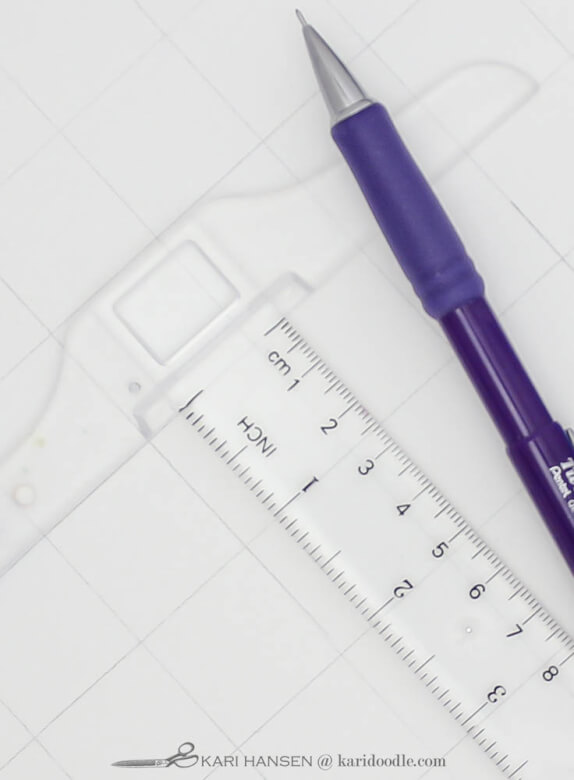
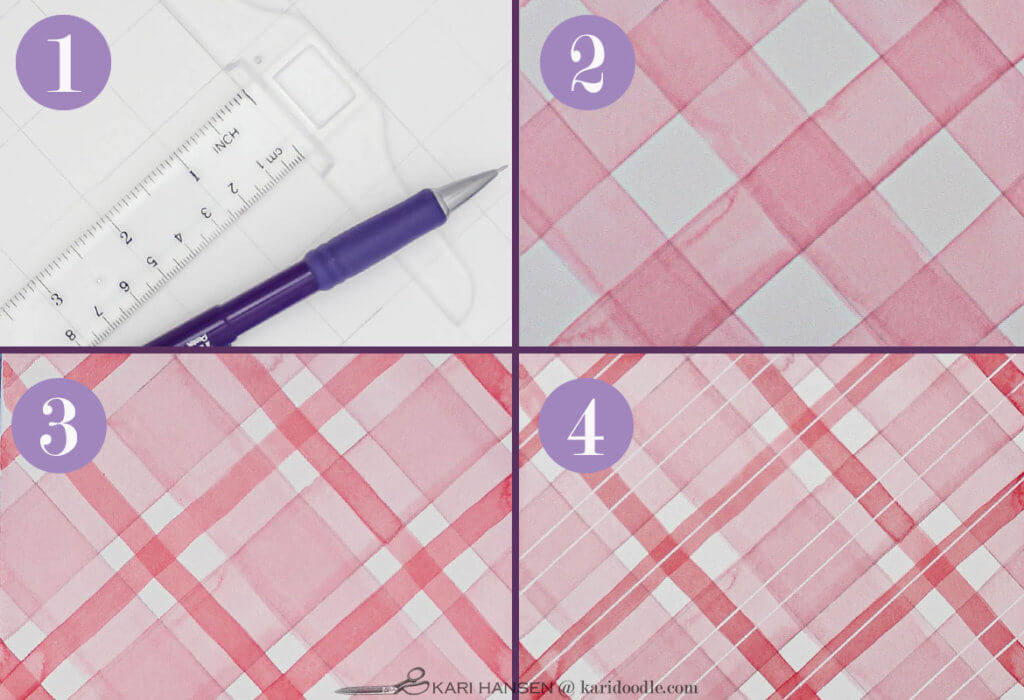
I like to lay the groundwork by drawing on faint pencil lines with a T-ruler before I paint. If you have an innately straight hand, you can wing it without guides. But since I tend to lilt to the upper right, I prefer the assurance that guidelines will keep the bands even and plumb.
#4: Square the perpendicular.
When making the perpendicular pencil lines, we want them to intersect at a 90-degree angle (unless a diamond argyle is your intended look), regardless of their pitch. Use a T-ruler to check that the first perpendicular line is square, then use that first one as a guide for the remaining pencil lines.
#5: Simplify the color palette.
Just like fabric tartans are woven in a huge range of colors, you can paint your tartans in any color combinations you want. However, the easiest, most foolproof painted tartans consist of only one or two colors (in addition to the white of the paper).
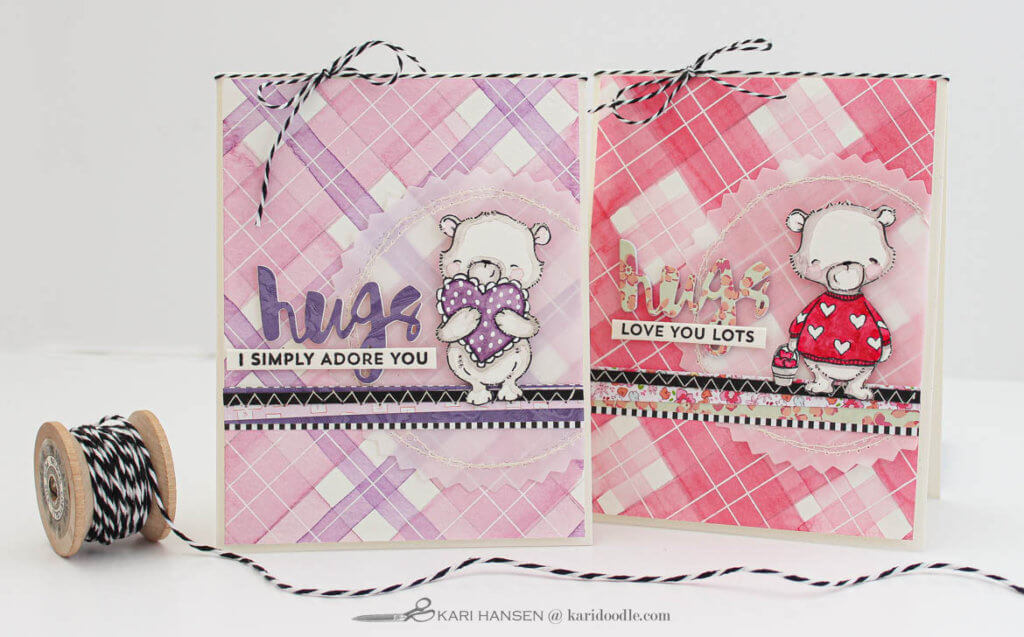
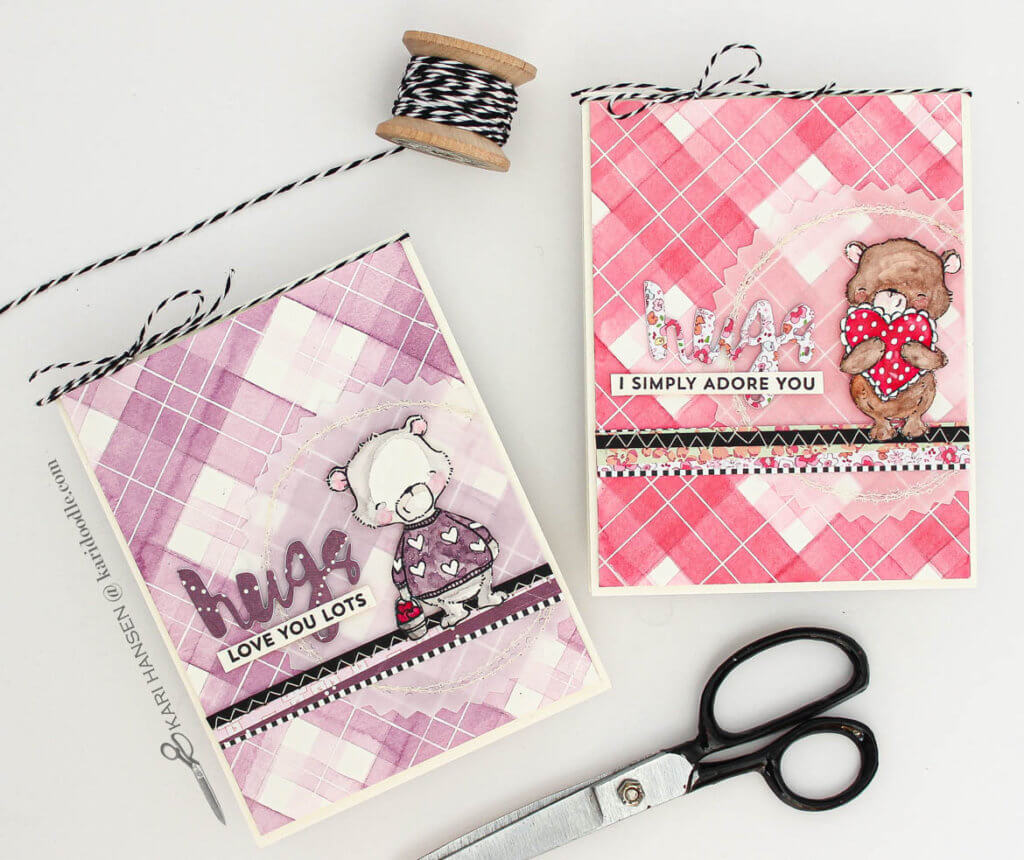
Most of my examples here use tints of only one hue. But if you want to spice it up, using a different color for the accent stripe is an easy way to add a second color while keeping the tartan design simple. Below, you can see an example of a monochromatic purple tartan in contrast to a two-color tartan in pink and purple.
#6: Design with symmetry.
In general, whatever the design has going in one direction, the same should be going in the other. This includes the width, color, and placement of the stripes. The goal is to create symmetrical gridding and overlapping where the stripes intersect. But if your tartan doesn’t turn out exactly this way, it’s okay—just call it a plaid! A tartan is identical in both directions, while a plaid can vary.
#7: Vary the stripe width.
Varying the stripe width within the tartan design creates the most interesting pattern. For example, my panels contain a wide stripe, a narrow one, and several fine lines. If all the stripes are the same width, the result might look like a check or gingham. And while checks and gingham are both lovely, neither will do if your goal is to create a tartan.
#8: Maintain white space.
Maintaining white areas of unpainted paper between stripes provides benefits to the overall design:
- White margins between colors make it easier to control where the bands overlap, crucial when using a transparent medium like watercolor.
- Wide white areas between the main, thickest stripes leave room to apply accent stripes in different widths and colors.
- White space gives the design some breathing room, allowing the various stripes to be defined and create a distinctive pattern. This airier approach is well-suited to the delicacy of watercolors.
There are many traditional tartans, such as Black Watch, with its solid navy, black, and kelly-green ground, that don’t include white space. The result is a substantial, dramatic look. But for watercolor tartans, especially ones we want to keep easy and simple, planning white space into the design will yield the best results.
#9: Embrace blooming and slight imperfections.
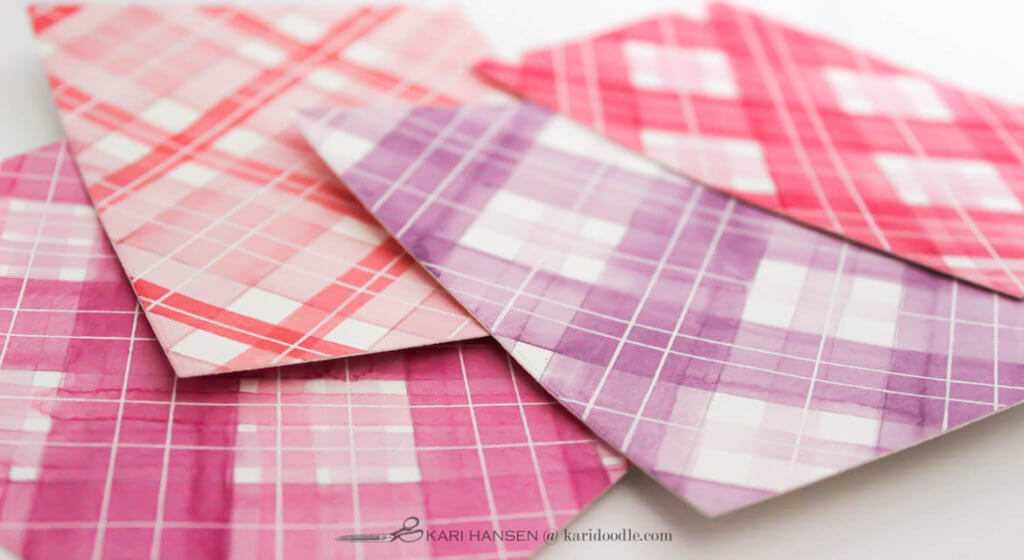
In watercolor, those ruffled, kind-of-hard edges that can naturally occur when wet paint spreads are called blooms. Some consider blooming a mistake, but IMHO blooms are no big deal and can look cool. It’s okay if the watercolor paint blooms a bit here and there on your stripes. Just like it’s okay if your stripes are not perfect and the pencil lines are slightly visible.
If you look closely at my tartans, you can see both blooming and a bit of stripe wonkiness going on. This just adds to that perfectly imperfect look of a handmade piece. (See Doodler Mindset #3)
#10: Dry for definition.
While some blooming within the stripes is fine, you still want to keep the edges of your bands in control. Your watercolor tartan will turn out crisper, with better-defined stripes, if you let the bands in one direction dry completely before painting the perpendicular stripes. Let each set of stripes air dry, or expedite the process with a heat tool, before moving on to the next. Shiny paint = wet paint.
#11: Finish with fine lines.
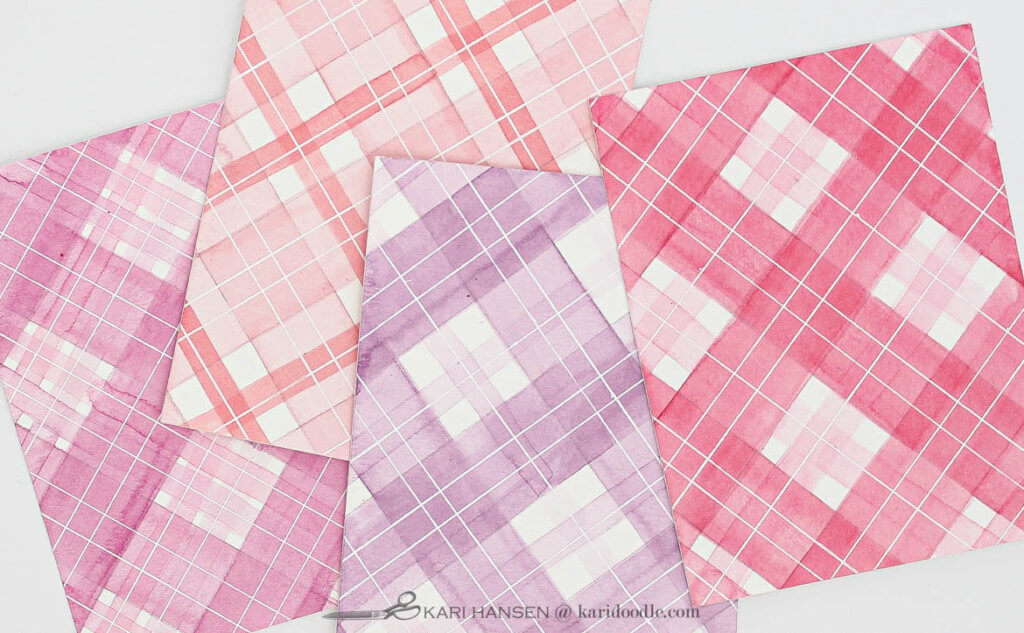
When you finish painting the bands in both directions, your tartan will probably look pretty good, but also kinda flat. It’s the final step – adding the fine lines on top of or in between the wider painted bands—that brings it all together. Those lines can be light or dark, and they can be painted, drawn, or stamped on. No matter how they’re applied, those lines are the details that give the design depth and make the tartan look finished.
These tricks will help you get past your first date with painted tartans. A few of these tips are specific to using watercolors, but most can also apply to tartan-making with any medium, whether it’s stamping, stenciling, acrylic paints, markers, or colored pencils. And while this list is tailored to easy, simple tartan designs, much of it would be relevant to more involved handmade tartans as well.

Step-by-Step: Easy Watercolor Tartan Background
Now that you know all my best tartan tips, let’s get out the watercolors and get to it! Here are step-by-step instructions for how to make your own simple watercolor tartans or plaids:
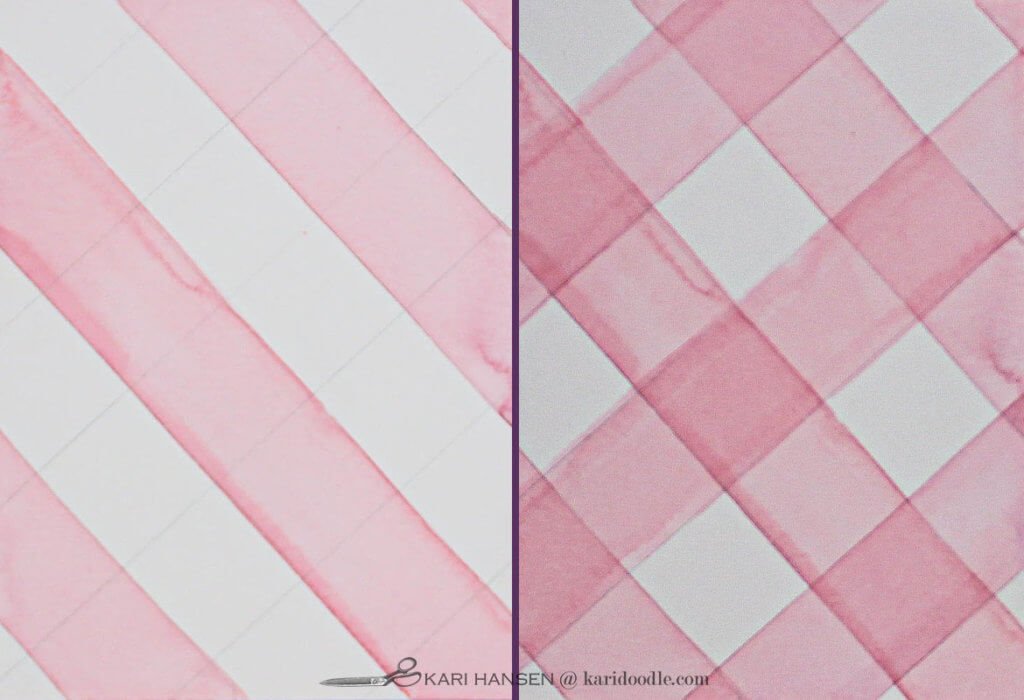
#1. Cut watercolor paper to approx. 4.5 x 6” for an A2 card, or ½” larger than you want your finished project to be.
#2. Using a T-ruler and pencil, lightly draw guidelines in both directions, spacing lines about one inch apart. Do this easily by employing the body of the ruler as your spacer. This one-inch scale is just right for this size of paper: not too grand nor too fussy.
#3. Tape watercolor paper to a hardboard.
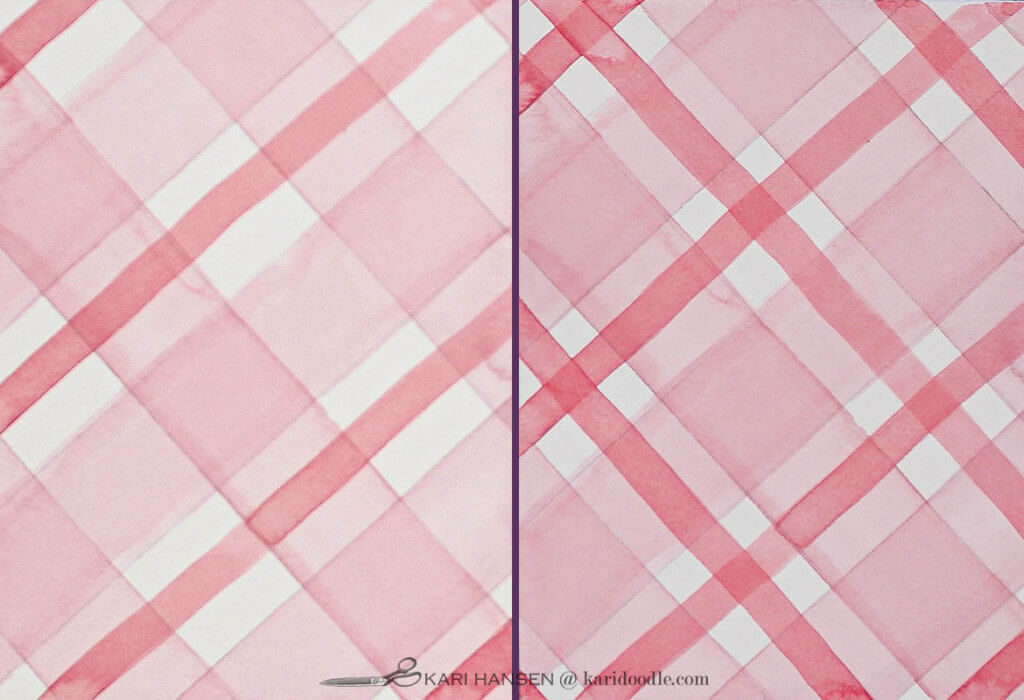
#4. Using a paint palette, mix desired color for large stripes, diluting the paint with clean water to increase its transparency in order to create sheer layers when applied to paper.
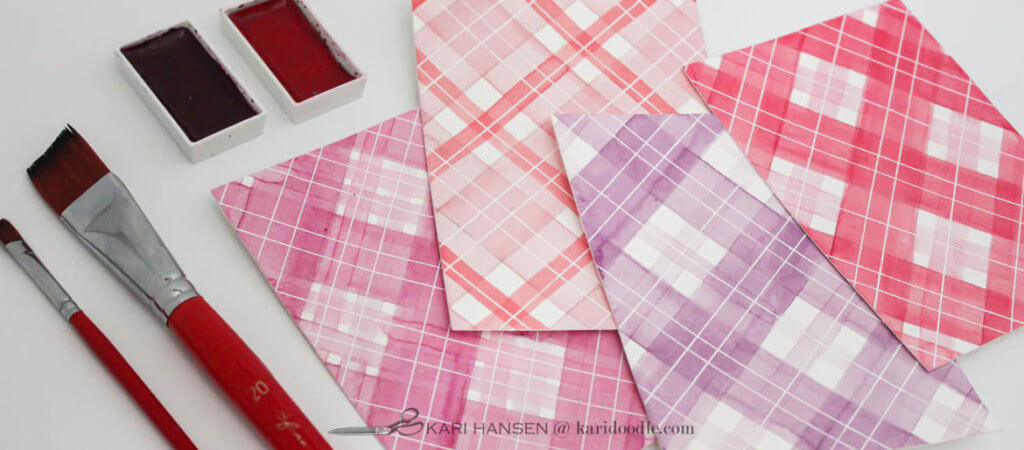
#5. Using a #20 flat brush, paint wide stripes in one direction, skipping every other section. Let dry, or dry with a heat tool. Apply a second layer of paint if needed and let dry. Repeat with perpendicular wide stripes.
#6. Prepare paint in the palette for narrower accent stripes. To make accent stripes lighter than the wide bands, take a few drops of the paint you used for the wide stripes and further dilute that with clean water.
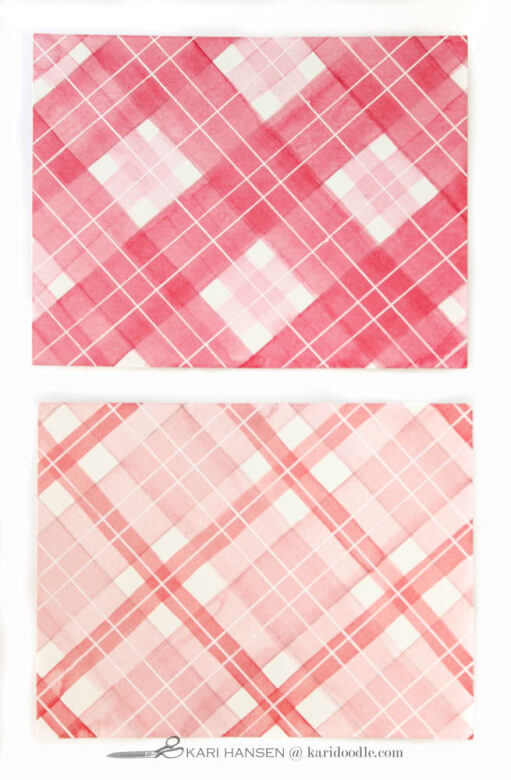
#7. If you want to make the main stripes lighter than the accent stripes darker, reverse the process. Mix the accent stripes first, then make a diluted version of this mix for the wide stripes. On the right is an example of two red tartans. One has darker wide bands and lighter narrow bands, while that order is reversed on the other panel.
#8. Using a #12 flat brush, paint narrow stripes centered in the unpainted white areas. Let dry, then repeat for perpendicular narrow stripes.
#9. Once all paint is dry, use a white gel pen and T-ruler to draw in accent lines on top of painted stripes. For best results, draw the lines on slowly, allowing the ink to come out smoothly and minimize skipping. Leaving the ruler in place, let the line dry for 10-15 seconds, and then apply a second layer on the line.
#10. Remove paper from the hardboard. Trim to desired size. Your handmade, one-of-a-kind tartan background is ready to use! Totally swoon-worthy!
Once you’ve mastered painting these simple but satisfying patterns, you’ll be ready to take your tartan relationship to the next level with more complex versions. Let the romance commence!
Step-by-Step: Teddy Love Cards
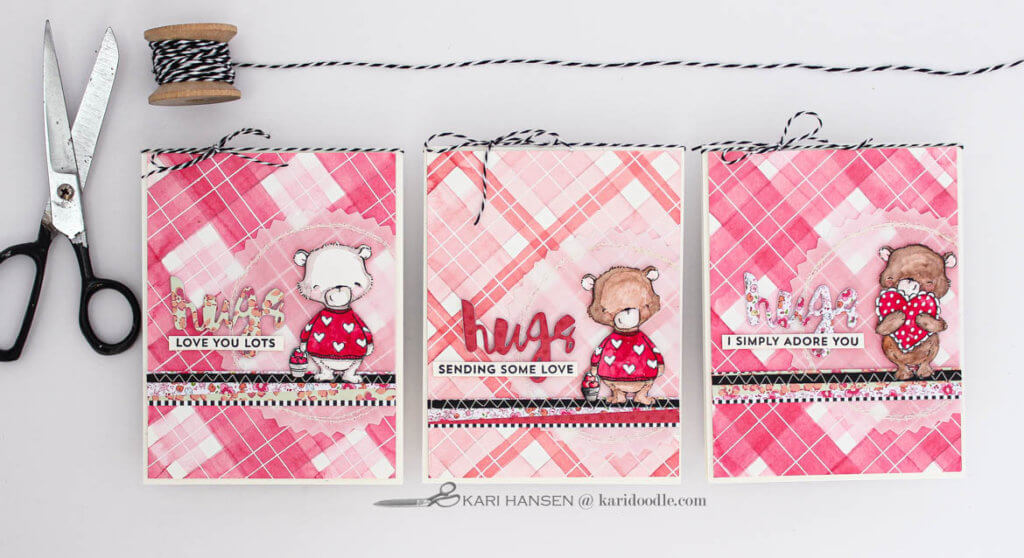
I used these watercolor tartans as backgrounds for a set of love cards, perfect to send some virtual hugs and affection to friends and family. The little bears are from the Joyful Heart Bears stamp set. This set includes three darling bears and some sweet, larger sentiments that I used for the inside of my cards. My favorite of those sentiments is “Your Heart and My Heart are Very Old Friends.”
Love stamping little animals like these cuddly bears? You might also like: How to Make Crazy Cute Critter Cards for your Kids’ Teachers.
After I finished the tartan panel following the steps given above, here’s how I turned them into cards:
- Stamp bear using waterproof black ink and a stamp positioning tool (MISTI) onto watercolor paper.
- Stamp sentiment onto ivory cardstock with black waterproof ink. Trim or die-cut into narrow sentiment strip. (I used ivory rather than bright white cardstock for the sentiment strip and card base because it coordinates better with the soft white of the watercolor paper.)
- Paint bear with watercolors. (I painted both brown bears and polar bears.) Allow to dry. Fussy cut or die-cut bear. Add white details to puffy heart or bear’s sweater with a white gel pen. Make the bear’s nose stand out with a black Glaze gel pen.
- Trim or die-cut watercolor tartan panel to 4 x 5.25” using trimmer or rectangle die.
- Die-cut Shape Shifters Circle #1 die from white vellum.
- Die-cut “hugs” word die three times from white cardstock. Stack and adhere words together using liquid glue. Die-cut “hugs” one more time from a patterned paper scrap. Adhere as top layer of word stack.
- Use narrow strips of black cardstock and patterned paper scraps to create a layered strip embellishment.
- Sew a zig-zag stitch over the black cardstock strip. While at the sewing machine, straight-stitch around the inside perimeter of the vellum circle die-cut a couple of times.
- Arrange bear, sentiment, scrap-paper strip, and “hugs” die-cut on vellum circle as desired. Use foam tape to adhere bear onto vellum circle, leaving the bear’s feet free of adhesive. Adhere vellum to panel by placing liquid glue only behind the bear. Adhere paper strip, tucking the top edge under the bear’s feet. Add some tiny drops of glue under feet. Adhere sentiment strip to the G’s descender on “hugs”. Place thin strips of foam tape on the back of the sentiment, then dot liquid glue on the back of the word. Adhere to the tartan panel.
- Mount tartan panel onto A2 (4.25 x 5.5”) top-folding card base. I used craft foam to pop the panel up from the card base.
- Add baker’s twine to top of card in a bow.
Doodle tip: The layered strip of patterned paper I made as an accent on the cards is a fun way to use up little scraps. This kind of strip can be used to ground the smaller elements to each other and the composition. I also like how the strips adds some funky texture to the design and visually break up the tartan pattern.
Supplies
- Joyful Heart Bears stamp set, My Favorite Things (retired)
- Similar: Huggable, Reverse Confetti
- Similar: Pawsome Love, Simon Says Stamp
- Hugs die, Simon Says Stamp
- From the Heart sentiment stamp set, My Favorite Things (retired)
- Similar: More Essential Sentiment stamp set, My Favorite Things
- Similar: You are Loved sentiment stamp set, Simon Says Stamp
- Shape Shifters Circle #1 die set, Papertrey Ink
- Nesting rectangles die set
- Sentiment strip die set, Pink & Main
- Gansai Tambi watercolor set, Kuretake
- Sakura Gelly roll pen, white size 10
- Sakura Glaze pen, black
- Versafine black ink, Tsukineko
- Black and white stripe paper, My Favorite Things
- Patterned paper scraps
- White vellum
- Ivory cardstock #110
- Black cardstock
- Cold press watercolor paper, Canson XL
- Baker’s twine, black & white
- White thread
Tools & Adhesive
- Platinum 6 die cutting machine | Spellbinders
- Misti stamping platform | My Sweet Petunia
- Sewing machine
- Paper trimmer
- Blending brushes | Taylored Expressions
- Heat tool | Wagner
- Photo printer | Epson
- All-in-one laser printer | Brother
- Scoring board
- Teflon bone folder
- Jewel picker | Katana
- Tag punch board | W R Memory Keepers
- Binding edge punch | EK Success
- Grid Transparency | Simon Says Stamp
- Small fine-tipped scissors | EK Success
- Distress Sprayer | Tim Holtz for Ranger
- Twist-Erase 0.5 mechanical pencil | Pentel
- T-square ruler
- Tweezers
- Hole punch
- Mini hole punch
- Black Velvet watercolor brushes, round #4, 8, 12 | Silver
- Watercolor brushes: purple handled round brushes set of 12
- Watercolor brushes: flat and round set of 7 in case
- Watercolor brush: #18/0 short liner
- Round paint palette, plastic
- Ceramic paint palette
- Hardboard
- Foam adhesive | Scotch 3M
- White ½” foam tape | iCraft
- Black ½” foam tape | iCraft
- Precision Craft Glue | Bearly Art
