Inside: Learn more about this daily chore checklist for kids that sets up a productive routine and teaches responsibility without constant supervision or nagging. #creativekidsquest
Twin beds tidily made. The contents of the dishwasher put away in the cupboards. My two children dressed, with hair brushed, rushing to hug me good morning.
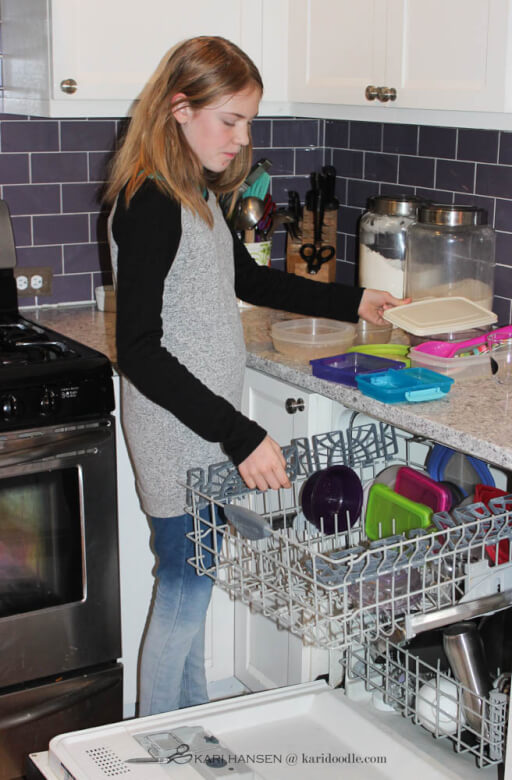
This is what greets me when I emerge from my office after working a few hours.
Have minions come to live with us? Have aliens replaced my kids with the latest Stepford models? Or am I in the middle of a Storybrooke-style waking fairytale?
Nope, this is the real deal.
Thanks to a couple of clipboards, this is my magic morning.
In this post:
Meet the System: Daily Checklists for Kids
Let me introduce you to the daily checklist system for kids.
I came across this method a few years ago on Stacy Julian’s website. My family has used it several summers in a row with success. We haven’t been using the clipboards for school mornings as Stacy does, but find them perfect for summer break to give the days some structure.
Read Stacy Julian’s post here: Kids and Chores
My favorite part? I love how this system shifts the responsibility for tracking chores and how they spend their time from my shoulders to my kids’.
When kids feel empowered, they feel more cooperative, and conflict is lessened. This system is a win-win: the kids do both things that they want to do and things you want them to do. But they get to do them when they choose. Kids love to have choices!
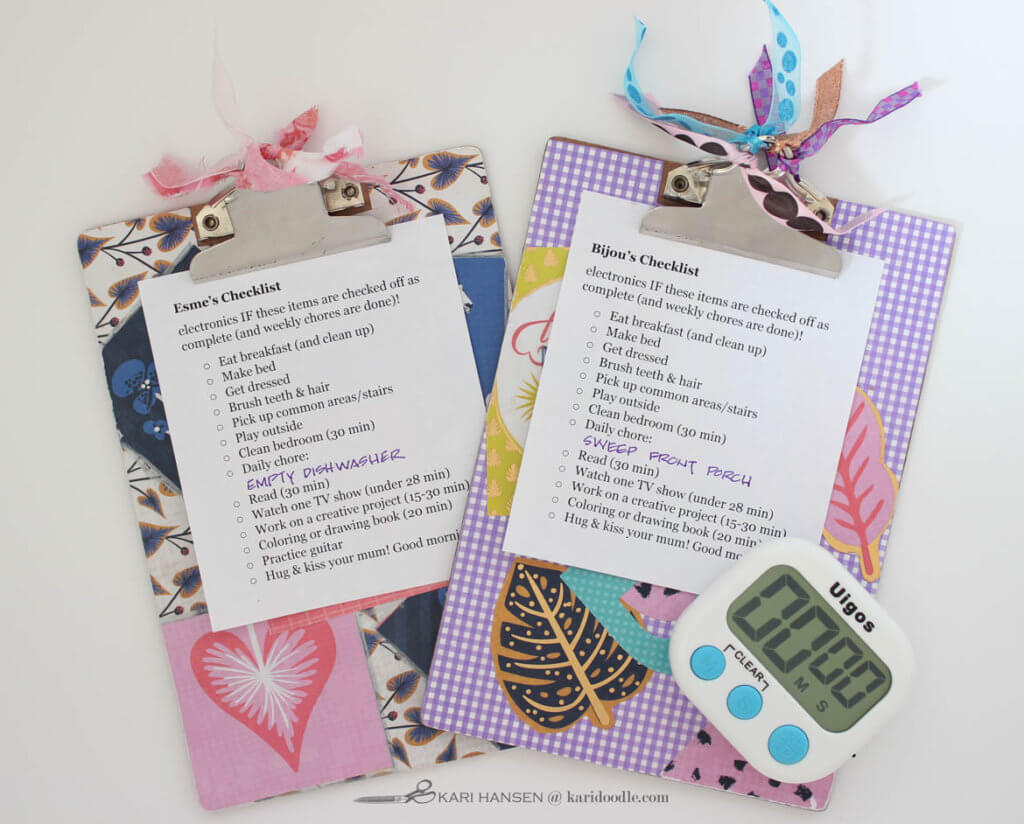
How We Use the Daily Checklist System
We use the full checklist on those summer days when we are home for all or most of the day. But if it’s a day when the kids have a camp or we are going on an outing, we either skip the checklists entirely or do a simplified version containing only the get-ready-for-the-day essentials.
I’m breaking out the clipboards this week, since I think it will be helpful while homebound during spring break. And why not continue with them when we start homeschooling again the following week?
My plan: task my kids with their checklist in the morning so the afternoon can be free and clear for creative time.
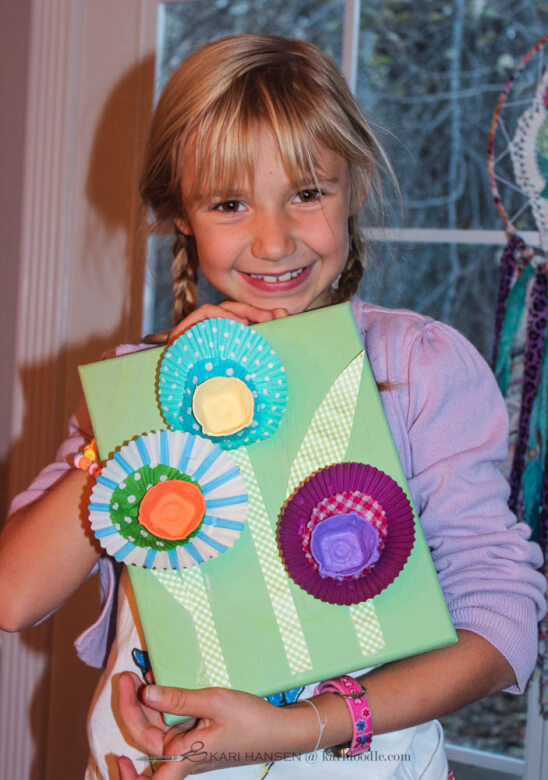
Project #1 in Creative Kids Quest
Give this the daily checklist system a go as part of your Creative Kids Quest. While this first idea is more of a creative system than a creative project, it will help you set up your day at home in a constructive way. Because getting your day off to a good start will make it easier for you to enjoy creative projects together.
Introduce the System with a Clipboard Craft Project
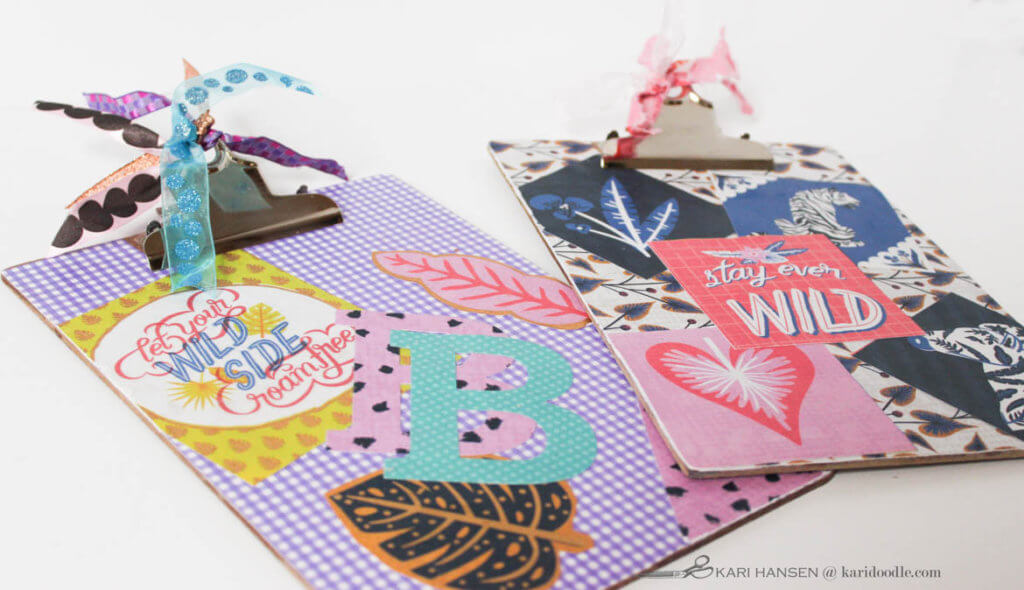
Kick off the checklist system by having each child decorate their own mini clipboard. Stacy used spray paint in her post, but a crafty collage approach is a better fit for my kids. Provide Mod Podge (we prefer the matte finish), patterned paper, stickers, and any other flat craft supplies you have on hand to decorate the clipboards.
While the kids are decorating their clipboards, tell them about the checklist system. Describe it in a positive upbeat way, explaining its benefits and rewards. Let kids know what’s in it for them!
How to Decorate Your Clipboards
Gather your supplies and let kids craft their own custom clipboards. Encourage them to personalize their boards in their own unique ways. Younger kids will need assistance with scissors and glue, while older kids can work independently. Parents can also make a clipboard for their own daily checklist!
- Cover the board. Using colored cardstock or patterned paper, cover the front of the board. We used patterned scrapbook paper, Mod Podge, and foam craft brushes. Cut the paper a smidge larger than the board (see the below tip for how to finish the edges nicely). Kids will likely need your assistance cutting a notch in the paper to accommodate the area where the clip attaches to the board. Wipe excess glue off the top and bottom of the metal clip. Let dry.
- Add decorations. Use stickers, hand-drawn pictures, paper cut-outs, paint pens, glitter glue, washi tape, and any other flat embellishment, to decorate the board. Include child’s name, initials, or monogram if desired. Once finished, coat the board with a thin top coat of Mod Podge for long-term durability. Let dry.
- Embellish the clip. Add bits of ribbon or yarn to the clip if desired.
Doodle tip: How to make nicely finished and fitted edges. When decoupaging paper onto a hard surface like hardboard or chipboard, use sandpaper to make the paper edges flush and integrated. Cut paper slightly larger than the board. Make sure all edges and corners are well-adhered with Mod Podge. Once dry, use a small piece of fine-grit sandpaper to knock-off the paper overhang and smooth the edges flush with the board. Sand the edges in a motion perpendicular to the edge rather than back-and-forth across the edge.
11 Tips for a Successful Checklist System
Now that my family has used the checklist system for a couple of years, we’ve learned lots of hacks along the way. Some are directly related to tips in Stacy’s post, and some we learned on own over time. These tips help kids stay enrolled in the system while also keeping them on task.
#1. Make a checklist to fit your kids’ ages and your family’s routine. Customize your list based on your family’s interests and responsibilities. Get your kids’ input on what should go on their list. When my youngest was not yet reading, I made her checklist in pictures.

#2. Keep the checklist concise and doable. You want your kids to be able to finish everything by the deadline. For kids under age ten, 3-4 hours is about the max they can stay focused on the list. And if there are too many items, they will get discouraged and not even try.
#3. Make the checklist a mix of fun items and must-do items. Include a mix of kid-preferred items on the list, such as “play outside” or “play with the dog” as well as mom-preferred items like “make your bed” or “brush your hair.” I love Stacy’s suggestion to write “hug your mom” as an item, and my kids do too.
Doodle tip: TV Time as a To-Do Item. If you look at my list, you’ll see that one of the items is to watch a television show. That may sound weird to put on a kid’s to-do list. But for me, this item is the key to making the whole system work. Since screen time at my house is limited during the school year and must be earned on the weekends, my kids feel practically giddy about having this choice. Because of this special privilege, they’re more onboard for the items they don’t like as much, such as doing chores.
#4. Give kids their own easy-to-use timer. If you have timed items on the list, such as “read for 30 minutes,” make it simple for kids to track without your help. Get a timer for each child and write their names on them with a permanent marker. Keep them on the fridge or their clipboards when not in use.
My kids use their timers for other purposes too, like for schoolwork, for screen time, and for baking. I love this one with its big, easy buttons and magnetic strip.
#5. Provide expectations for chores. When putting chores on the list, set kids up for success by spelling out what completing that task means to you.
To be sure you’re all on the same page, make an index card for each chore that lists its action steps. These cards can be laminated if you wish, and then kept on a ring or posted in the corresponding room.
For instance, if you assign “clean the bathroom”, be sure to include “empty the trash can” if you want that done (my kids don’t think of this otherwise). What’s obvious to you may not be to your young helper.
#6. Put out a fresh checklist the night before. Before you turn in for the night, update the clipboards with a new sheet of paper. Fill in the chore(s) for the day and any other special checklist items. Leave them on the kitchen counter for your kids to see first thing in the morning.
My girls are early birds and often wake up before me during school breaks. So I must do my part to make the latest checklist available so they can start on it first thing in the morning. I’ve found it helpful to set a recurring alarm on my phone for 9:00 pm as a reminder to update the clipboards.
#7. Set a deadline to complete the checklist. During school holidays, our deadline is usually lunchtime. The kids work on the checklist in the morning, in whatever order they choose, while I am working or doing my own chores (or sleeping). The goal is to have the checklist done before lunch so we can spend the afternoon on our creative projects and even some screen time.
During the homeschooling weeks ahead, we’ll adapt the list to reflect our schedule. There’ll be a morning section to be done before schoolwork starts with get-ready tasks. And we’ll have an afternoon section that the kids can work when they wish on breaks and after school time.
#8. Stick to the list. If they haven’t finished the list by the deadline, gently but firmly remind (don’t nag or scold) that they still need to finish up before you can begin the creative project. The longer they take to finish their checklist, the less time you’ll have to be makers together.
If one child has finished but the other has not, start the project with the finished child, telling the other than she can join you as soon as she’s completed her list.
For some items, you can check their work. For others, such as reading, you’ll have to use the honor system or come up with a feasible way to monitor it, such as having them read in the same room where you’re working.
#9. Don’t interfere with the order of completion. Stay out of it and let them do their list in whatever order they choose. If you have more than one child, you should also let them decide if they want to work on their items together or separately. (I do let mine watch each other’s TV show.)
Unsurprisingly, my kids watch their TV shows first before they do any other items on the list. I’m hoping that someday the concept of delayed gratification will kick in. But until then, I bite my tongue when I hear My Little Pony playing at 7:00 am.
#10. Make the reward worthy of the work. The only way to keep kids motivated to do their checklists is to make the prize truly awesome. In this case, the reward will be your undivided attention and an afternoon of crafty fun. (And screen privileges won’t hurt either.)
You must keep your word about the reward! Not only must you follow through on the creative projects, but you must do whatever you can to make the crafting time low pressure and positive for your kids.
Let kids express themselves, make mistakes, and try it their own way. Refrain from judgment or expectations about how the project will turn out. If kids worry about doing it wrong, hearing criticism, or disappointing you, they won’t want to craft with you. Embrace and model a growth mindset. And remember, there is no right or wrong when it comes to making — only learning and bonding opportunities.
Read more about my maker mindset. The same ideas apply to crafting with kids!
If you want to add screen privileges, money, or other incentives as part of the reward, go for it. The bigger the payoff, the more motivated kids will be to complete their checklist.
#11. Be consistent. Speaking from personal experience: any chore or rewards system will only succeed if the parents are consistent. If you don’t make kids accountable for the checklist or you don’t follow through on the rewards, the whole system will fall apart.
There you have it, all the checklist hacks I’ve accumulated after using this system with my kids. Give the checklist a try for more focused and productive days in your home. Make the near-magical powers of the clipboard work for your family too!
As you set forth with your own checklist system, I leave you with this blessing:
May your afternoons be filled with quality family time. May your kids be contentedly busy and creative. And may your car be vacuumed by the very hands that trashed it.
I’d love to hear how the checklist system is working for you! Leave a comment here or on my Facebook page.
This post is part of the Creative Kids Quest series.
The goal of Creative Kids Quest is to provide ideas and inspiration for fun and creative projects parents and kids can make together to banish boredom while housebound due to self-isolating, quarantine, or extreme weather. #creativekidsquest
Find links to the whole series below:
- Intro to Creative Kids Quest: How to Be Creative with Kids While Stuck in the House
- Project #1: How to Help Kids Have a Focused Day When School’s Out
- Project #2: How to Make an Epic Paper Mural with Your Kids
- Project #3: Here are the Easy Cookies Kids Can Proudly Bake By Themselves
Supplies
- Mini clipboards
- Timer
- Paint pens
- Mindset: New Psychology of Success
- Stickers
- Bloomin’ Wild 12 x 12” paper pad, Craft Smart (Michael’s)
- Mod Podge Matte decoupage medium, Plaid
- Foam brushes
- Glitter glue
- Washi tape
- Scissors
- Sandpaper, fine grit
- Ribbon
- Mega Alphabet B die, Altenew
- Binder rings
Want to remember this idea for kids’ daily checklists? Save it to your favorite Pinterest board!

