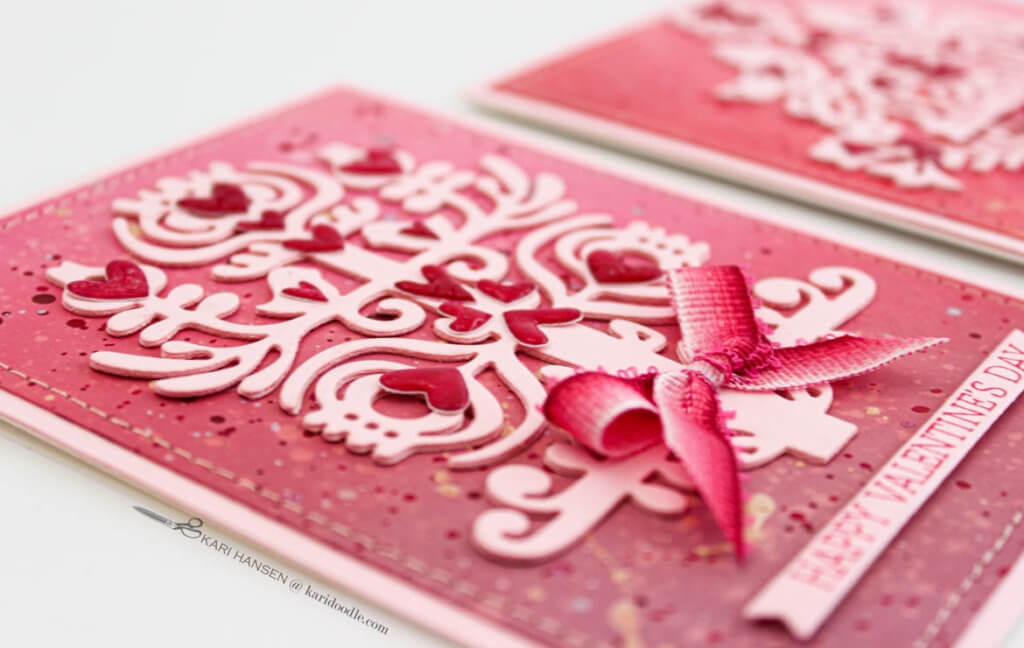
Inside: Instructions for how to use traditional Nordic folk florals to make handmade Valentine’s cards with a Danish modern look.
“Dear hearts, where have you been all my life? I’ve been lonely without you,” the Nordic tree die-cut said lovingly to the tiny, shiny, paper hearts.
“We are so happy to be here with you now, oh wise one,” sighed the little red sweethearts as they nestled contentedly into the stoic tree’s branches.
If paper could talk and you held very still and listened, this conversation could surely be overheard on my craft table as I created these Danish-inspired Valentines. When I put the Scandinavian-style dies together with the little hearts, the pairing had that “meant to be” synergy, as if they had been waiting to be put together.
In this post:
Be Inspired by Danish Hearts for Jul and Beyond
While contemplating ideas for Valentine’s cards, I remembered a photograph of Copenhagen decorated for Christmas. Fir branches wrapped in fairy lights arched across a city shopping street. Fastened to the centermost swags were oversized red shiny hearts, aglow in the holiday eve. Below is a similar photo.
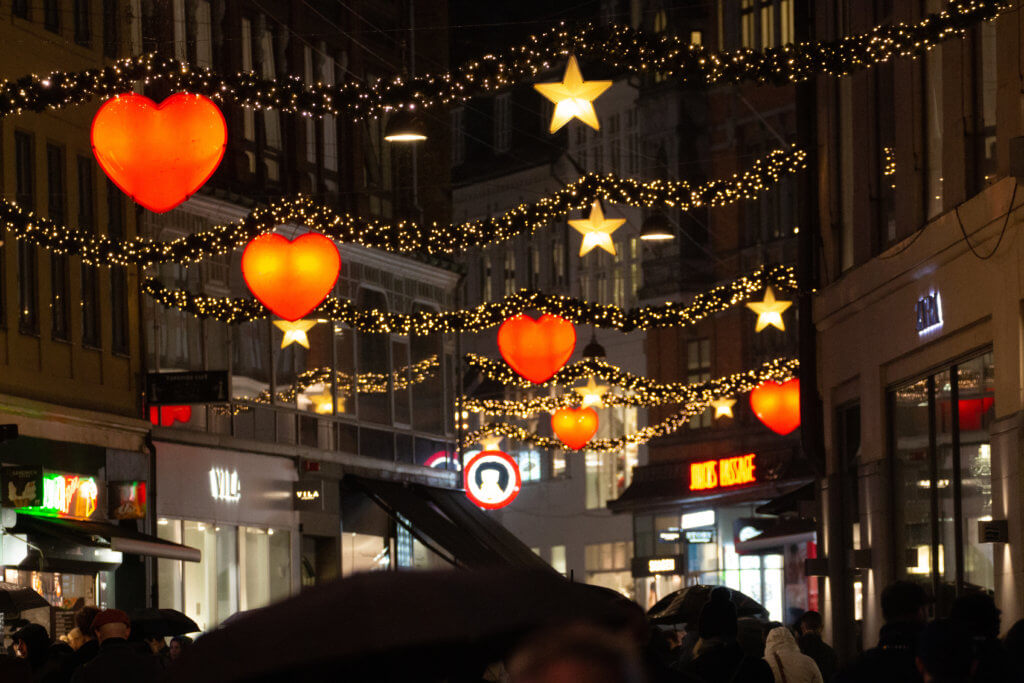
The large puffy hearts in the photo are not an accidental holdover from last Valentine’s Day. Instead, they symbolize the “Festival of Hearts”, as the Danes often call Jul—the Danish word for Christmas. Hearts and Jul are a natural pair to Danes, since the spirit of Christmastime boils down to a celebration of love, family, and community.
Hearts have long-standing cultural significance in Denmark, having been part of the Danish coat of arms since the 13th century. Denmark’s official travel site (visitdenmark.com) states that the heart represents trust, integrity, and freedom. In a similar fashion, the heart is used beyond Jul to symbolize the concept of brotherly love (otherwise known as the Golden Rule), a key part of the “live and let live” attitude held by most Danes.
That Danish penchant for hearts inspired me to work with the Lene Lok designer dies (Spellbinders) that feature her take on traditional Nordic folk motifs. How would the die-cuts look if I added hearts? And by doing so, could I spin a Danish holiday tradition into modern Scandi Valentines?
Blend Inks for Die-Cuts and Backgrounds
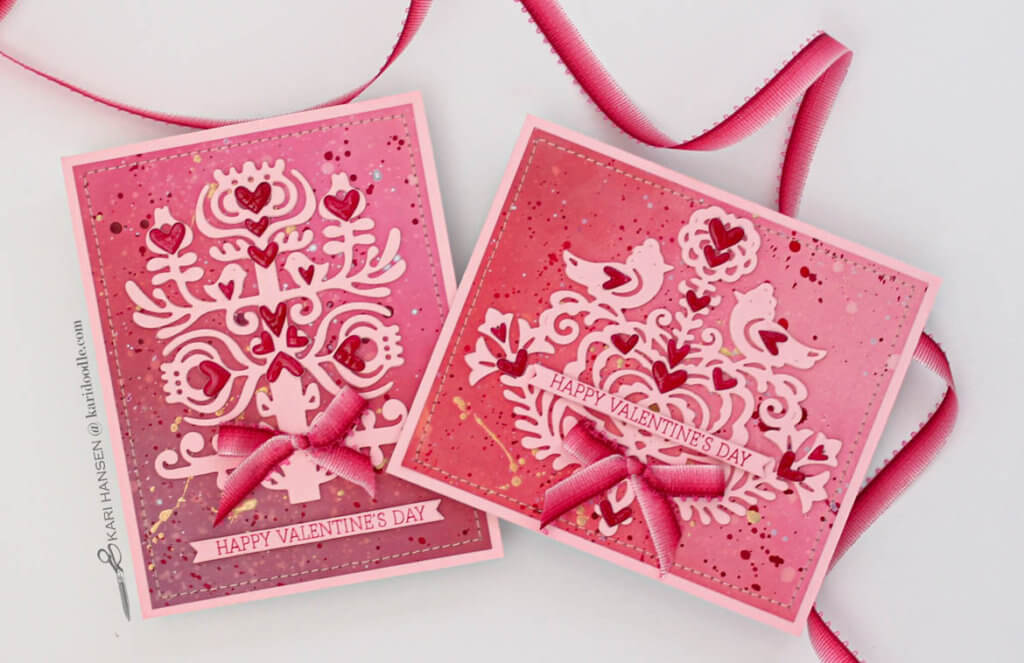
To start this project, I pulled Distress Oxide inks in pink, red, and purple hues. I cut heavy white cardstock into eight A2-sized panels (4.25 x 5.5”). Using blender brushes (Taylored Expressions), I blended inks onto each panel. I used 3-4 colors from each color group on each panel, creating an ombre look. When finished, I sprayed and sprinkled water droplets, letting the ink oxidize on the surface for a bokeh effect. I finished the panels with a few splatters of white, gold, silver, and red watercolor paints.
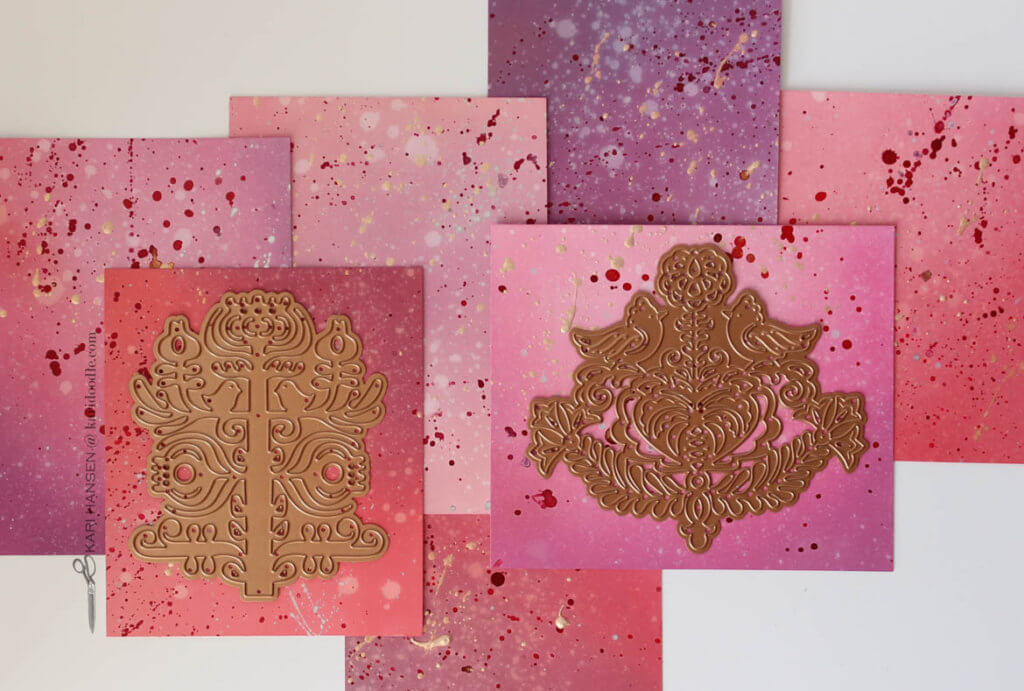
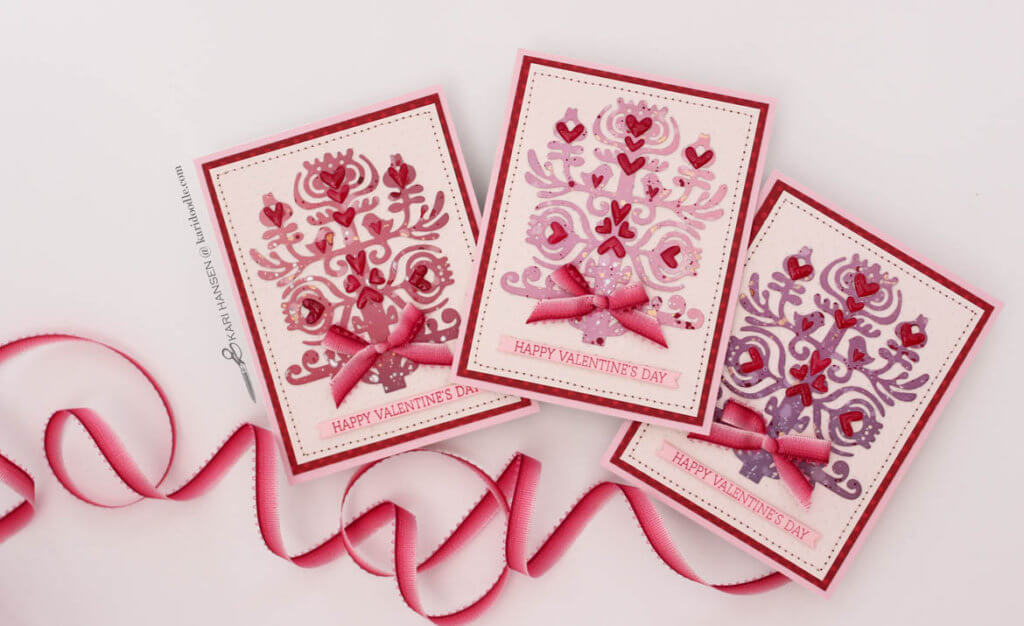
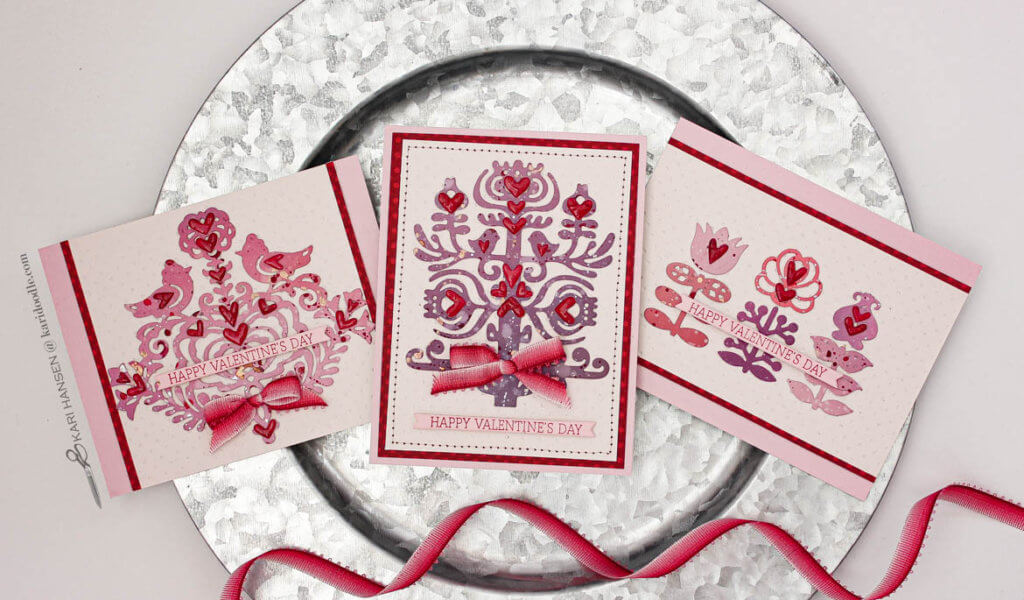
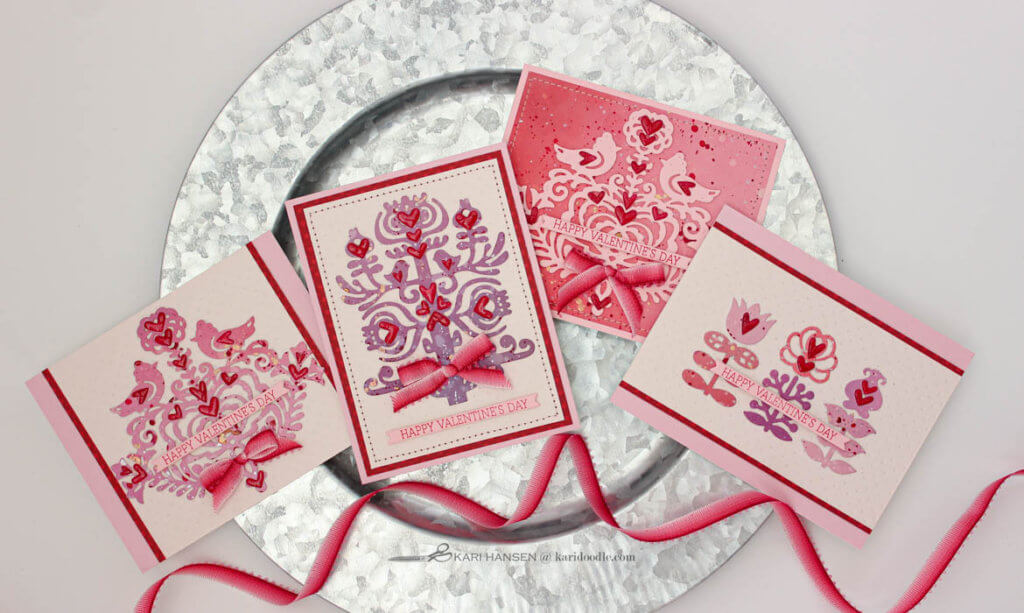
I set aside two of the panels to use as backgrounds with solid-colored cardstock die cuts. From the remaining panels, I die-cut either the Nordic Tree or Rosemal Heart die. I then used the Nordic Blooms die set to die-cut smaller stems and flowers from the leftover pieces of ink-blended cardstock, making sure I had a variety of pink, purple, and peachy-red to create distinct sets of flowers. I wanted each flower set to have a stem and bud in each of the three colors. Because I used up most of each ink-blended sheet with a combination of the large and small dies, I was able to squeeze twelve cards from eight panels.
Find more Spellbinders projects: How to Make Beautiful Inlaid Die-Cut Roses with Patterned Paper
Next, I die-cut all the pieces again from heavy white cardstock. I used liquid glue to stack each ink-blended die-cut piece on top of a corresponding white cardstock die-cut.
Lastly, I cut the Nordic Tree and Rosemal Heart dies from light pink cardstock, three times for each die design. I stacked and adhered these die-cuts, again using liquid glue. These solid colored pieces will be used with the ink-blended backgrounds.
Paint and Cut the Tiny Shiny Hearts
I wanted the little accent hearts to be a dark, rich red. I didn’t have quite the right color of cardstock, so instead, I painted a half-sheet of watercolor paper with raspberry-red paint. I dried this with my heat tool, then added a second layer for deep opaque color.
Using the Mini Hearts die set (Simon Says Stamp), I repeatedly die-cut hearts until the whole watercolor piece was used up. I arranged the hearts on the Scandi-style die-cuts until I was happy with the positioning, then adhered the hearts in place with liquid glue. Once the large die-cuts were attached to the card panels, I finished the little hearts with a shiny coat of Glossy Accents (Ranger).
Assemble the Valentine Cards
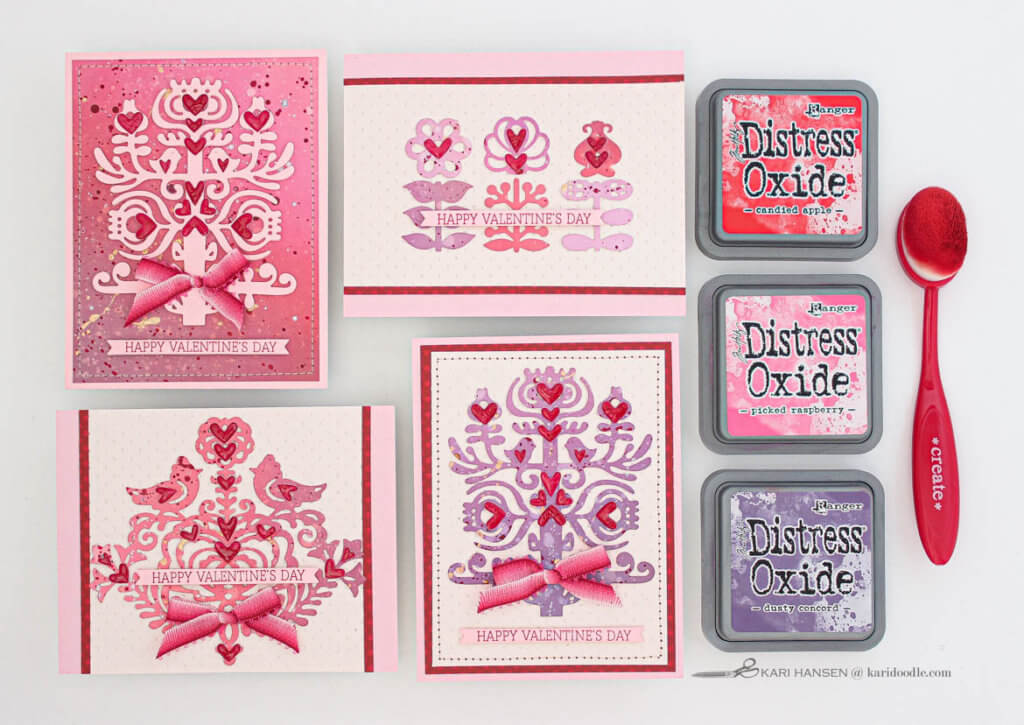
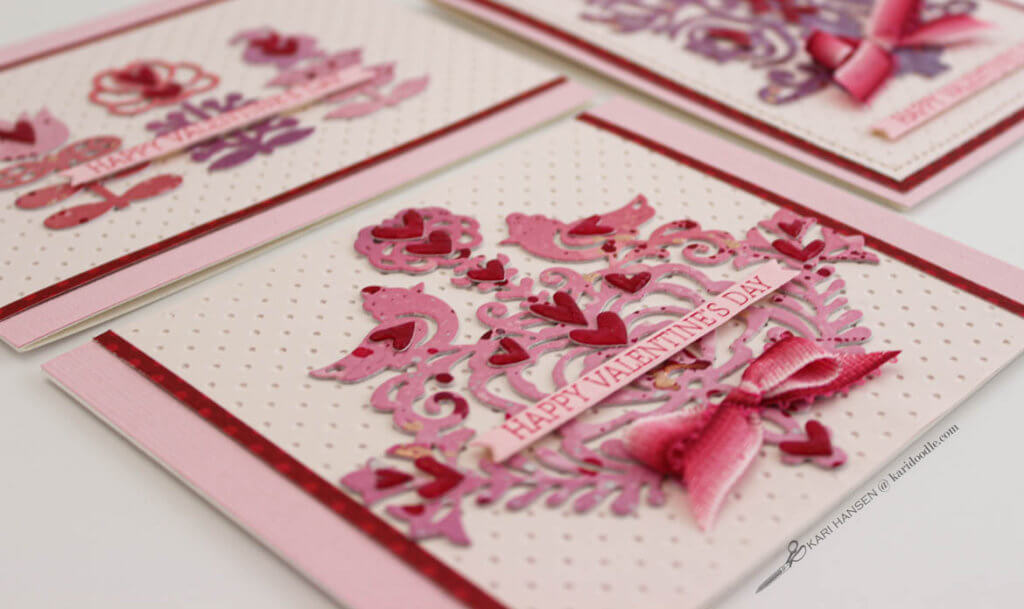
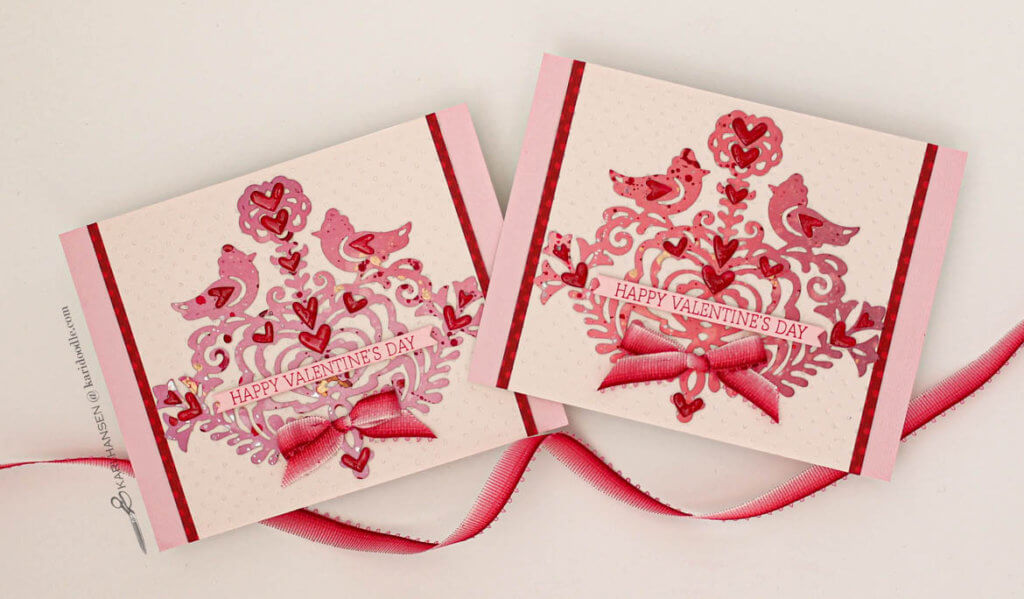
I designed four compositions for the ink-blended embellishments, one for each of the die sets. The only variation for each design is the coloration of the ink blends. For a textural but subtle background, tiny dots were dry-embossed onto palest pink cardstock. Each background was then matted with light pink cardstock and dark red patterned paper.
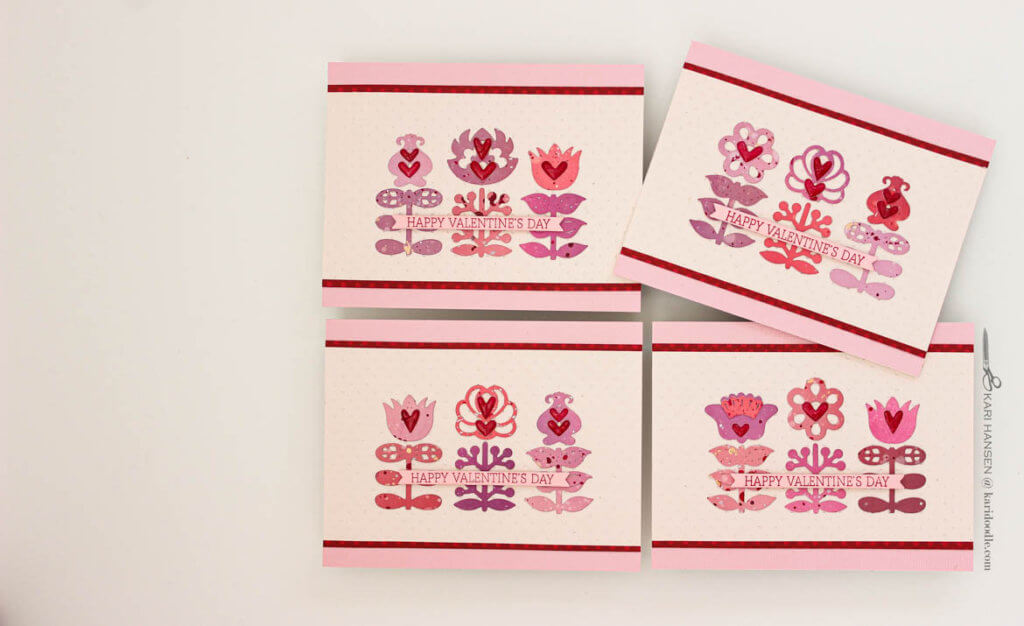
For the last two cards, the ones with solid cardstock die cuts on ink-blended backgrounds, the composition was kept very simple.
Each card was finished with a sentiment strip made with the Love stamp set (Hero Arts), dark red ink, and the Sentiment Strip die set (Pink & Main). Some designs were finished with rose gold thread, and some received a red ombre bow.
Each card front was mounted on an ivory cardstock scored and folded into an A2 (4.25 x 5.5”) card base.
My Danish-American soul is pleased with the results of this dainty heart and folk floral convergence. These Valentines are an example of how many generic images could be adapted for a specific holiday or event simply by using holiday colors or adding an iconic motif, like a holy cluster for Christmas, a party hat for a birthday, or hearts for Valentine’s Day. Give it a try with stamps or dies in your stash. If the pairing works, you’ll know it immediately when you see it. Even if you can’t quite hear the rustles of paperly love whispered between your embellishments, you’ll know in your artist’s heart if it’s a happy coupling.

Supplies
- Rosemal Heart die, Lene Lok for Spellbinders
- Nordic Blooms die set, Lene Lok for Spellbinders
- Nordic Tree die, Lene Lok for Spellbinders
- Mini Hearts die set, Simon Says Stamp
- Love stamp and die set, Hero Arts
- Sentiment strip die set, Pink & Main
- Tiny Dots embossing folder, Tim Holtz for Sizzix
- Distress Oxide inks, Tim Holtz for Ranger: Aged Mahogany, Barn Door, Candied Apple, Dusty Concord, Festive Berries, Fired Brick, Milled Lavender, Picked Raspberry, Seedless Preserves, Spun Sugar, Tattered Rose, Victorian Velvet, Worn Lipstick
- Glossy Accents, Ranger
- Gansai Tambi watercolor set, Kuretake
- Watercolor paper, Canson XL
- Wild Berry Red Dot 12 x 12” patterned paper, Bo Bunny
- Cardinal Versacolor pigment ink, Tsukeniko
- Palest pink cardstock
- Light pink cardstock
- Ivory cardstock #110
- White cardstock #110, Neena Solar White Classic Crest
- Pink/red ombre ribbon
- Thread medium/dark ecru 943-1054, Sulky
Tools & Adhesive
- Blending brushes, Taylored Expressions
- Liquid adhesive, Lawn Fawn
- Foam adhesive, Scotch 3M
- Scoring board
- Teflon bone folder
- Misti stamping platform, My Sweet Petunia
- Die-cutting machine, Spellbinders Platinum 6
- Sewing machine
- Paper trimmer, Tonic
- Distress Sprayer, Tim Holtz for Ranger
- Watercolor brushes
- Heat tool, Wagner
