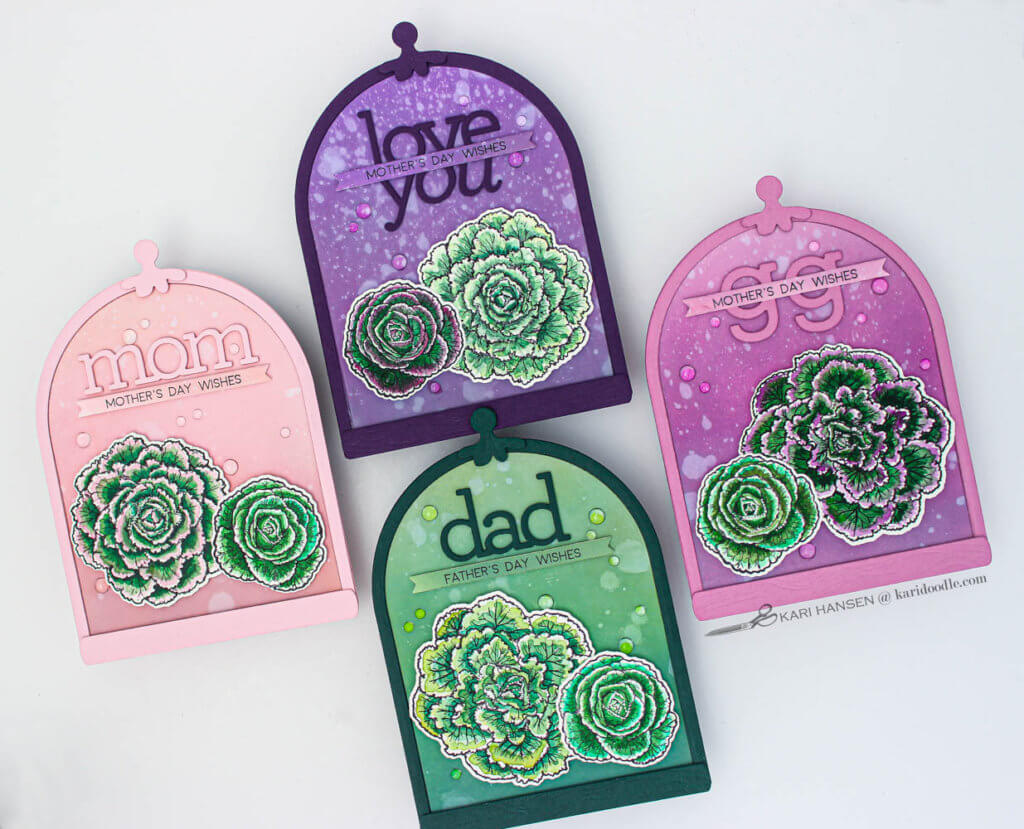
Inside: Learn how to color the uncommon flowerings of ornamental cabbage and kale, then nestle this funky veg on cloche-shaped handmade cards; includes step-by-step instructions and coloring tips.
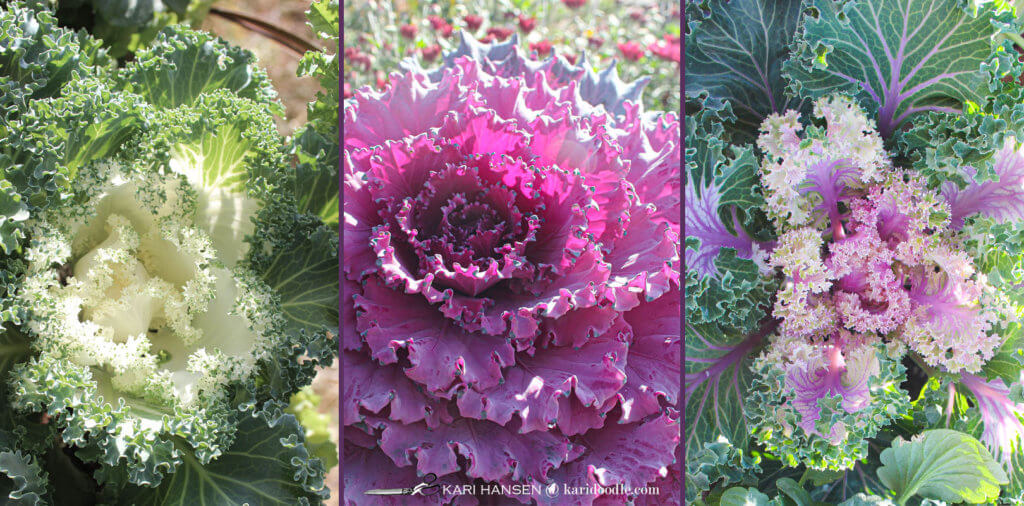
I spot them proudly protruding from planters, skirting flower beds, or peeking out of rustic bouquets. I admire their uncommon flower-ocity whenever I see them. I am constantly crushing on them, these ornamental cabbage and kale plants. These most beautiful of brassicas, resplendent in lush, variegated greens. Trimmed with purple, pink, and white edgings. Their appearance — hardy, crunchy, good-enough-to-eat contrasting with frilly, flirty ruffles – results in a plant-life paradox.
A vegetable that thinks it’s a flower.
In this post:
Construct a Paper Version of Flowers Under Glass
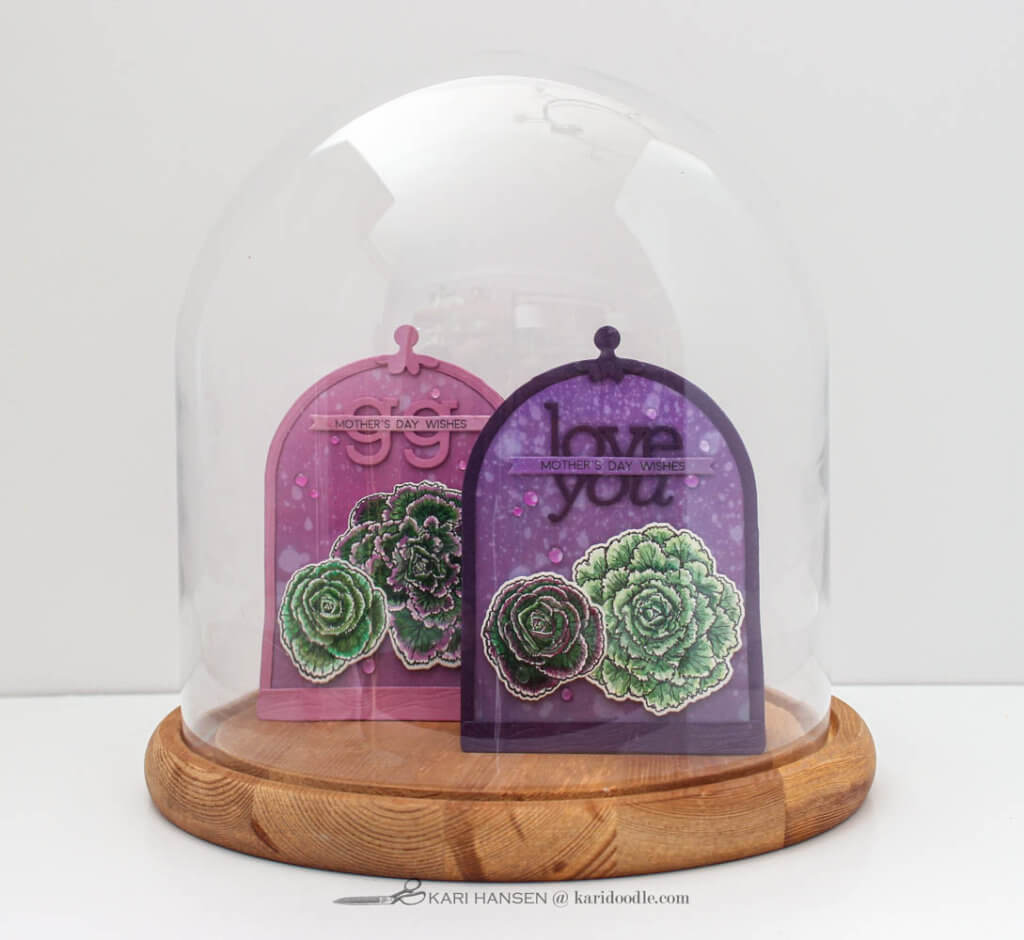
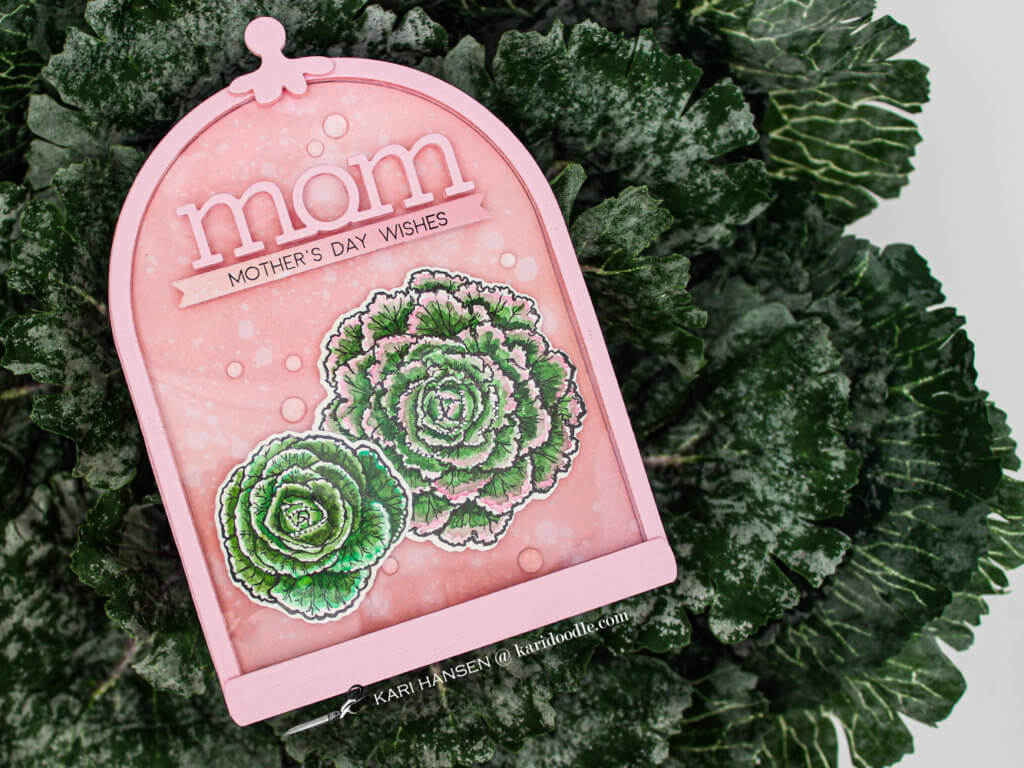
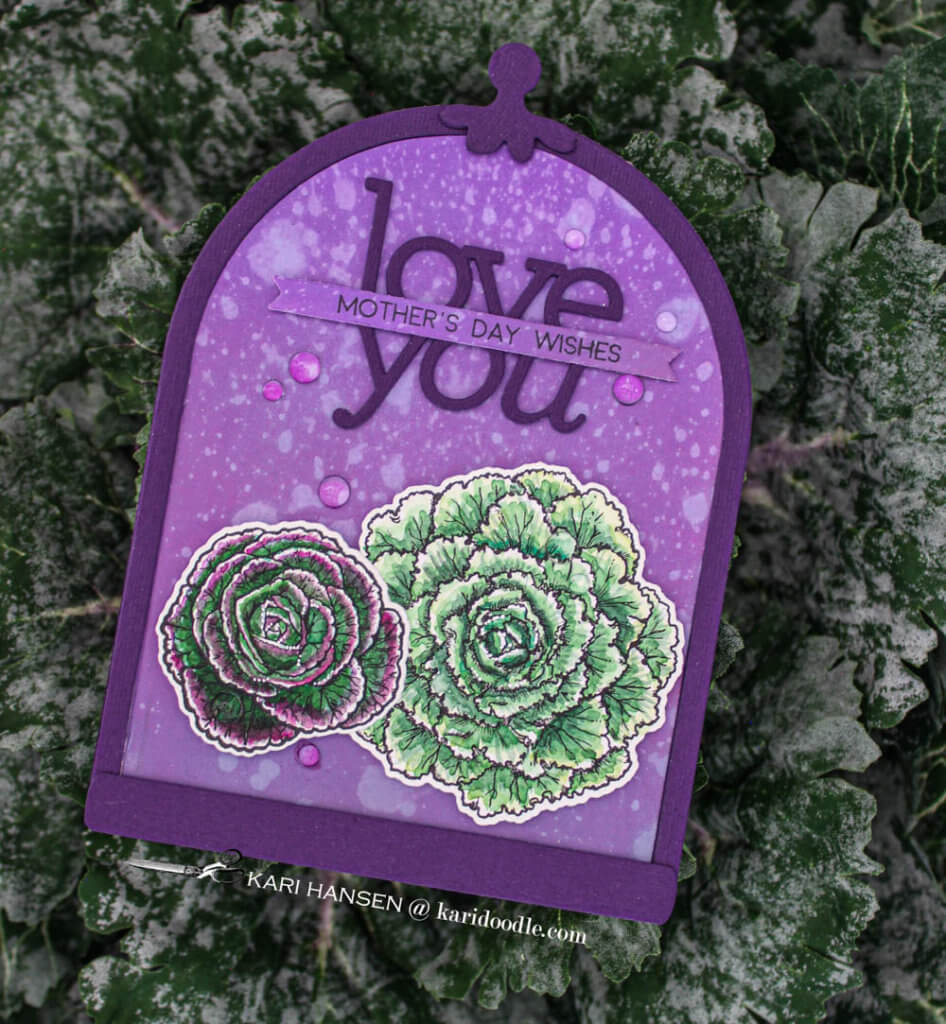
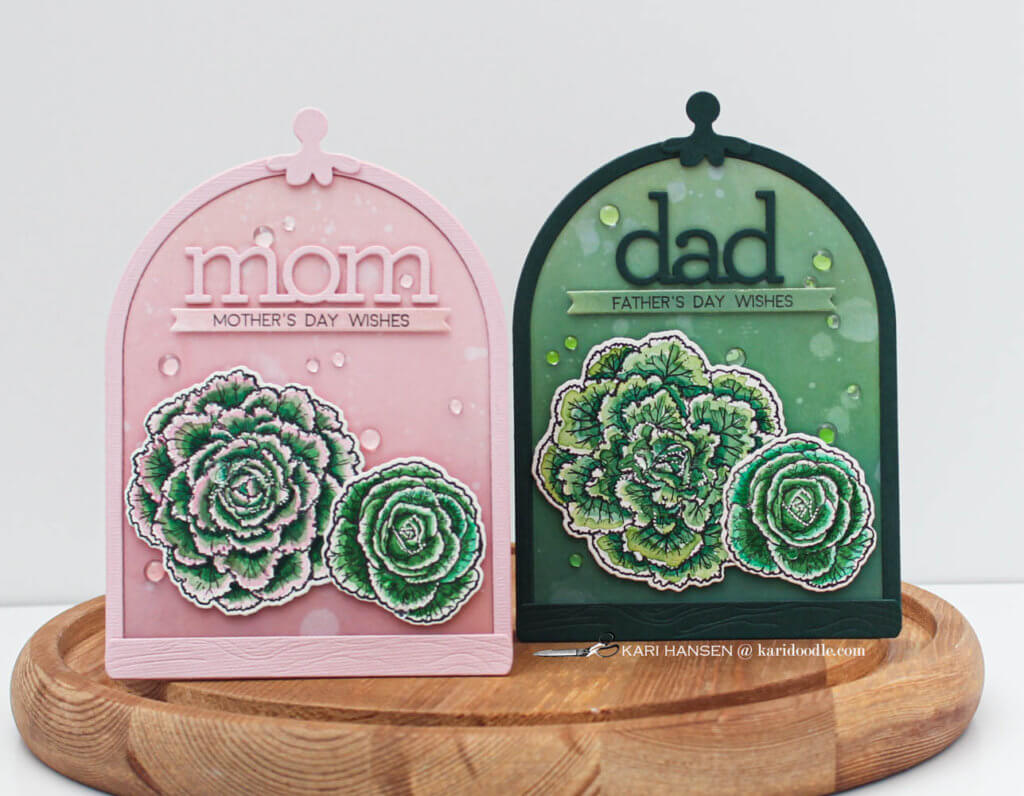
As a change from the usual floral arrangement, I wanted to create the look of greenery under glass – specifically a glass cloche dome. I did this by combining the veggie blooms of the Cabbage and Kale stamp set (Power Poppy) with the Nested Dome die set (Waffle Flower). While this die set can cut basic arched rectangles, it’s perfect for my design since it also contains dies to create a knob for the top and a woodgrain-embossed base for the bottom.
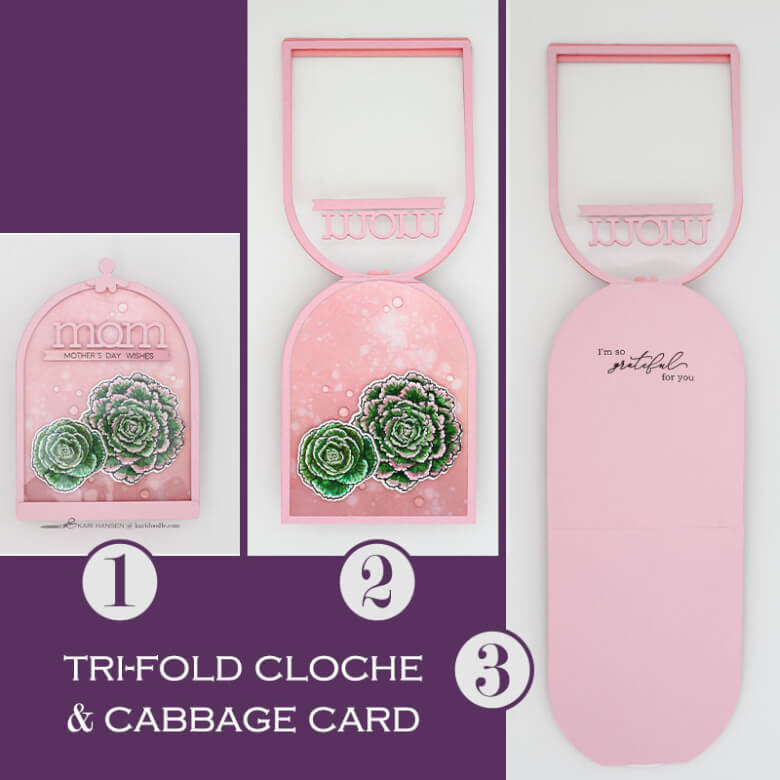
I used the Nested Domes dies to assemble shaped cards. I leveled up one of these into a trifold card, with acetate in the topmost fold and cabbage nestled underneath on the second fold, creating a design that truly mimics the “under glass” look. This design takes a bit of engineering, but the result is stunning. See below for photos and instructions to create this shaped trifold card.
Seek out more plant-inspired shaped cards: How to Make Terrarium Cards with Geometric Dies
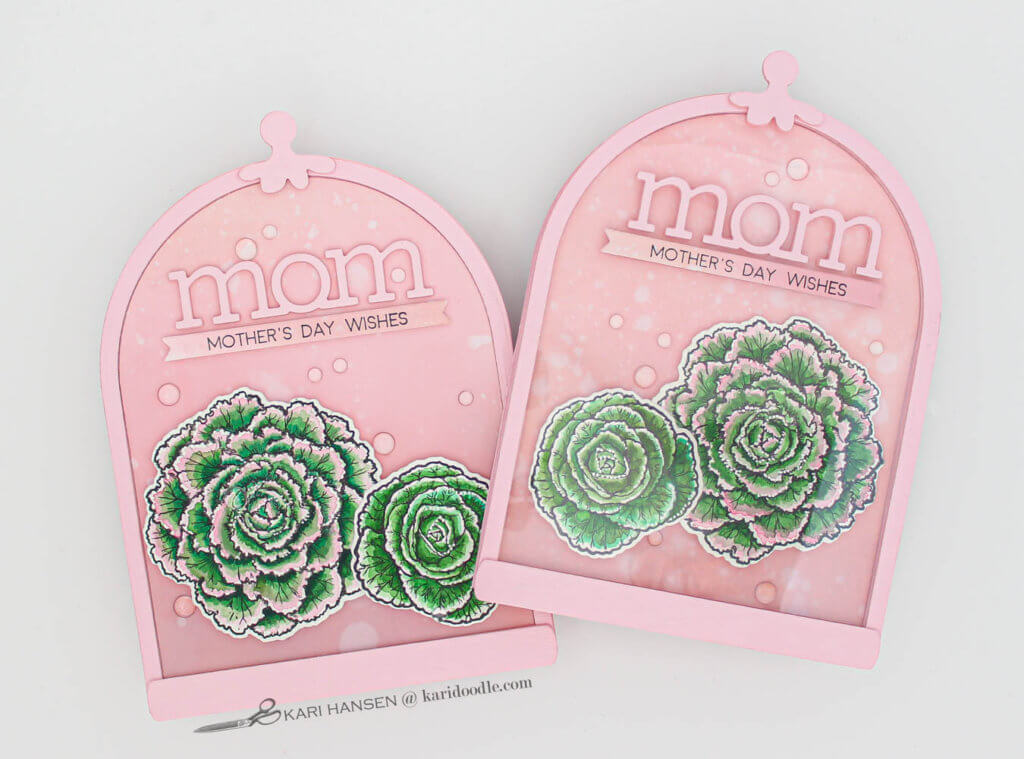
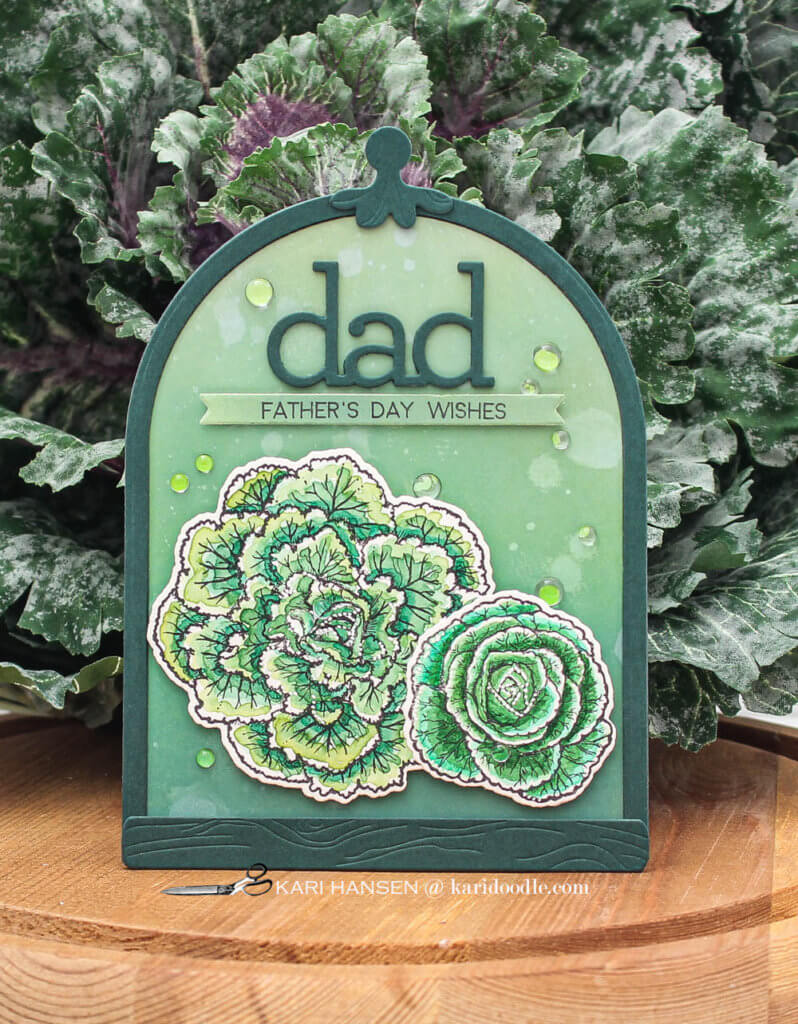
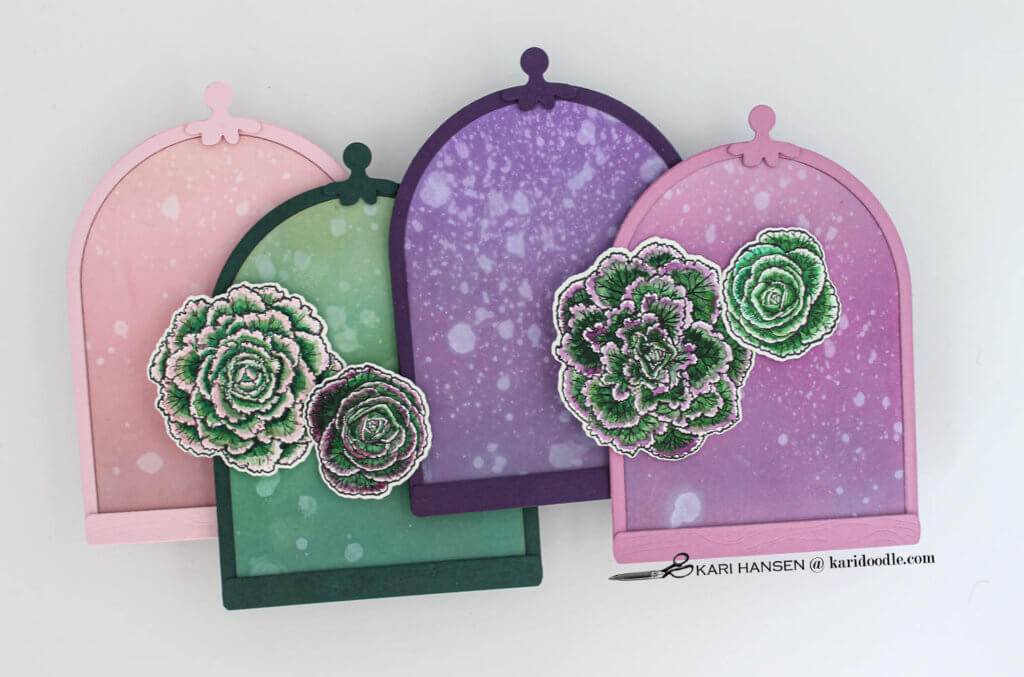
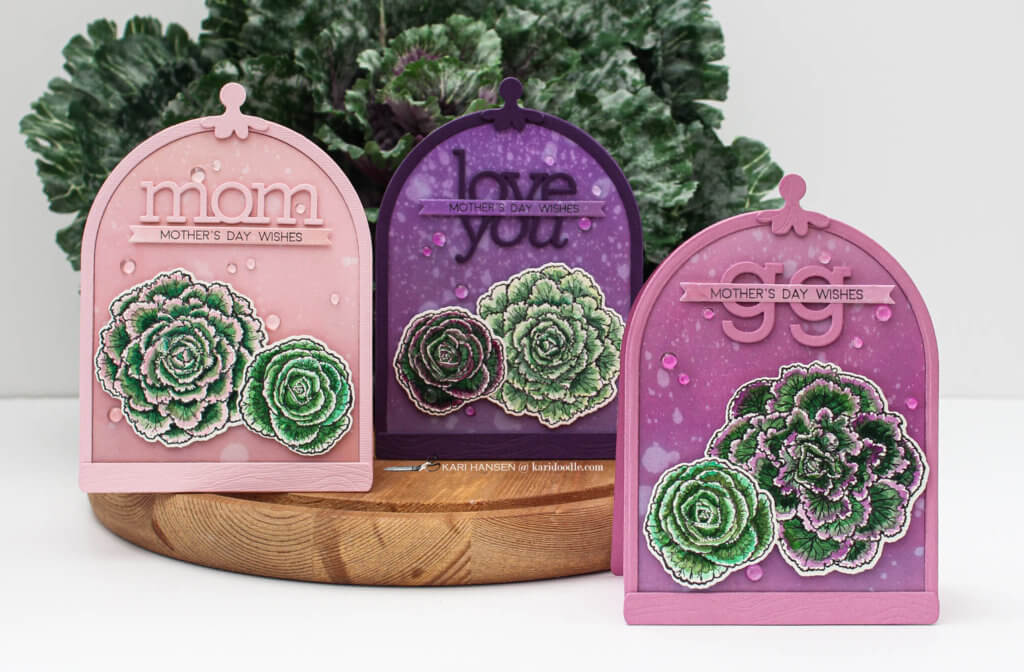
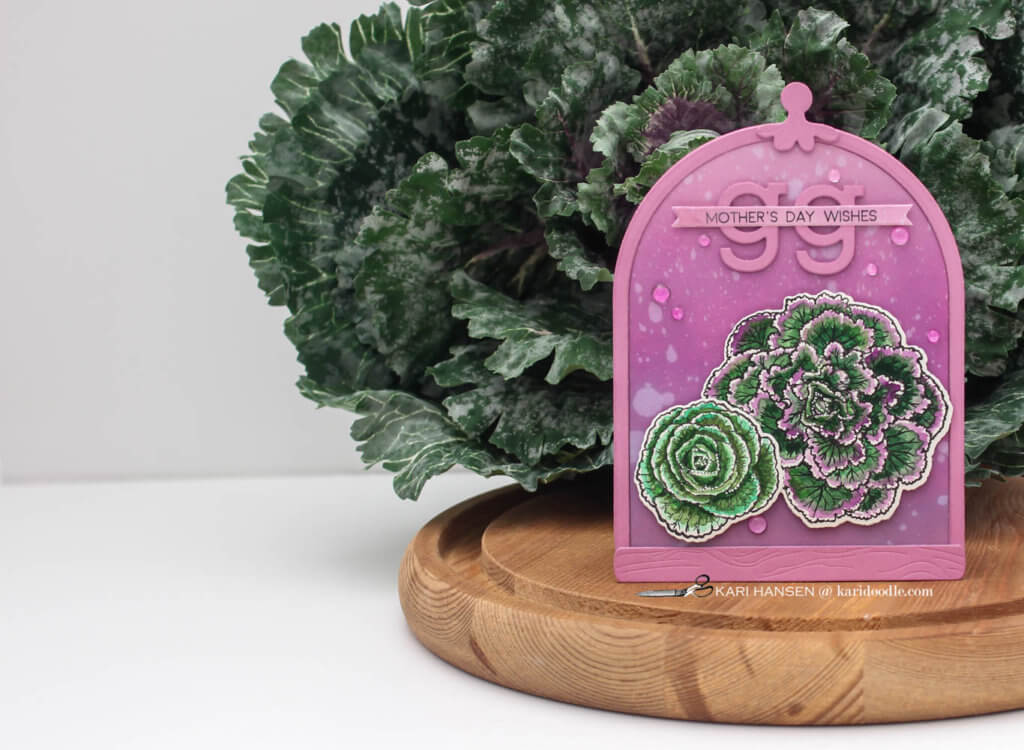
I used word and alpha dies, along with a sentiment stamp set, to make these cards themed for Mother’s and Father’s Day. (The violet “GG” card is for my grandma, who’s been called GG since becoming a great-grandmother.) I used Distress Oxide inks to blend water-spotted backgrounds and finished off the composition with clear droplets. Keep reading for full step-by-step instructions and a supply list.
Check out more funky plants on cards: How to Make Terrarium Cards Using Geometric Dies
6 Tips for Coloring Cabbage and Kale
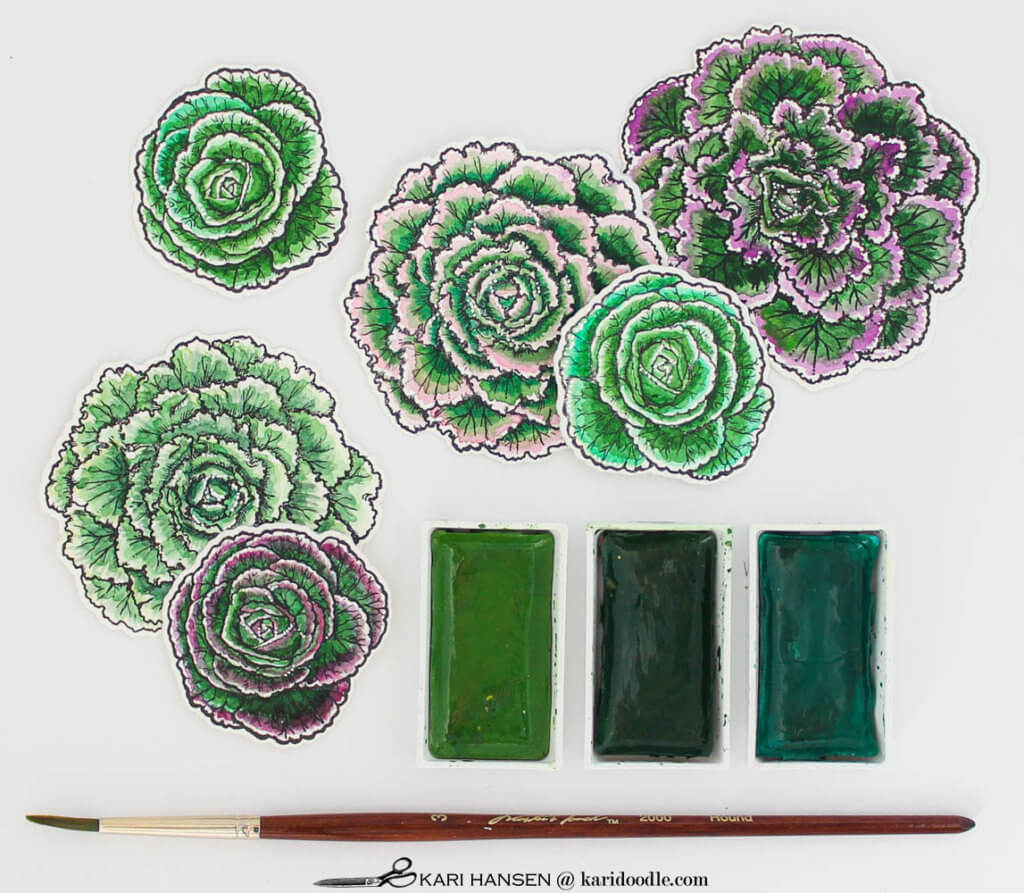
I used watercolors (Kuretake Gansai Tanbi) to color my ruffled cabbages, but you can also use Copics, colored pencils, or any other favorite coloring medium. Whatever medium you choose, here are some tips for coloring these beauties:
- Be adventurous with a wide variety of greens, as well as touches of purple, pink, and yellow, on your flora to make each one distinct. Mimic how greens vary greatly in nature, from yellowy chartreuse to blue-green celadon.
- Pull up photos online to view the variety of colors for ornamental cabbage and kale plants or make up your own species.
- To create distinct leaves within the radial composition of the plant head, leave white highlights on the tips of the leaves. Make the innermost part, where the leaves would connect to the stem, the darkest. Remember: it’s the darks and light that bring vitality and interest to the image.
- Paint in layers, starting with the lightest color in the largest area. Add successively darker, smaller layers radiating from the leaf base. Soften transitions by using a flicking motion to blend outwards with the paintbrush or marker tip.
- Use a white gel pen to easily add more highlights as needed.
- A white gel pen is also perfect to add tiny highlights to the leaf tips at the center of radial plants. Because the center tends to get dark and a bit indistinct once it is colored in, some well-placed tiny dots of white can add life and sparkle back into this area.
Love to watercolor? Then you’ll enjoy: Boost the Value of Your Stamps with Unexpected Color Schemes
Be Inspired by a Variety of Pretty Plants
I recently created another series of cards with a similar design concept. Like these cabbage and cloche cards, that set consists of plants and a representation of their containers. In place of cabbage, those cards featured succulents that I stamped and watercolored. I used large geometric dies to create an abstract representation of glass terrariums. And like these cloche-inspired cards, I used dies for the terrarium cards to create uniquely shaped cards. Click here to check out those cards: How to Make Terrarium Cards with Geometric Dies.
Step #1: Stamp and Watercolor the Cabbages and Kale
- Stamp plant images from Cabbage & Kale stamp set (Power Poppy) with waterproof black ink onto watercolor paper (Canson XL).
- Use watercolors to paint stamped kale and cabbage images. Let dry. See above for tips.
- Die-cut or fussy-cut plant images.
Step #2: Ink Blend the Backgrounds
- Cut a piece of white cardstock to 4.25 x 5.5.” Using blending brushes and Distress Oxide inks, create an ombre effect, with the darkest color on the bottom and lightest on top.
- Sprinkle a few water droplets of various sizes onto the ink-blended panel. Dab off excess water. Allow the panel to dry.
- Die-cut panel using second largest dome die. Place die flush into one of the bottom corners and tape into place. Reserve any leftover sections of the panel for a sentiment strip.

Step #3: Stamp and Trim the Sentiment Strip
- Set up the stamp positioning tool with a sentiment stamp. Make a test strip, adjusting as needed.
- Using black ink, stamp sentiment onto a leftover piece of ink-blended panel.
- Trim or die-cut the stamped sentiment into a narrow strip. Place a skinny piece of foam adhesive on the back.
Step #4: Make a Word Die-Cut
- Die-cut the “dad” or “mom” word die three times from the same cardstock as the arched frame.
- Stack and adhere the dies using liquid glue.
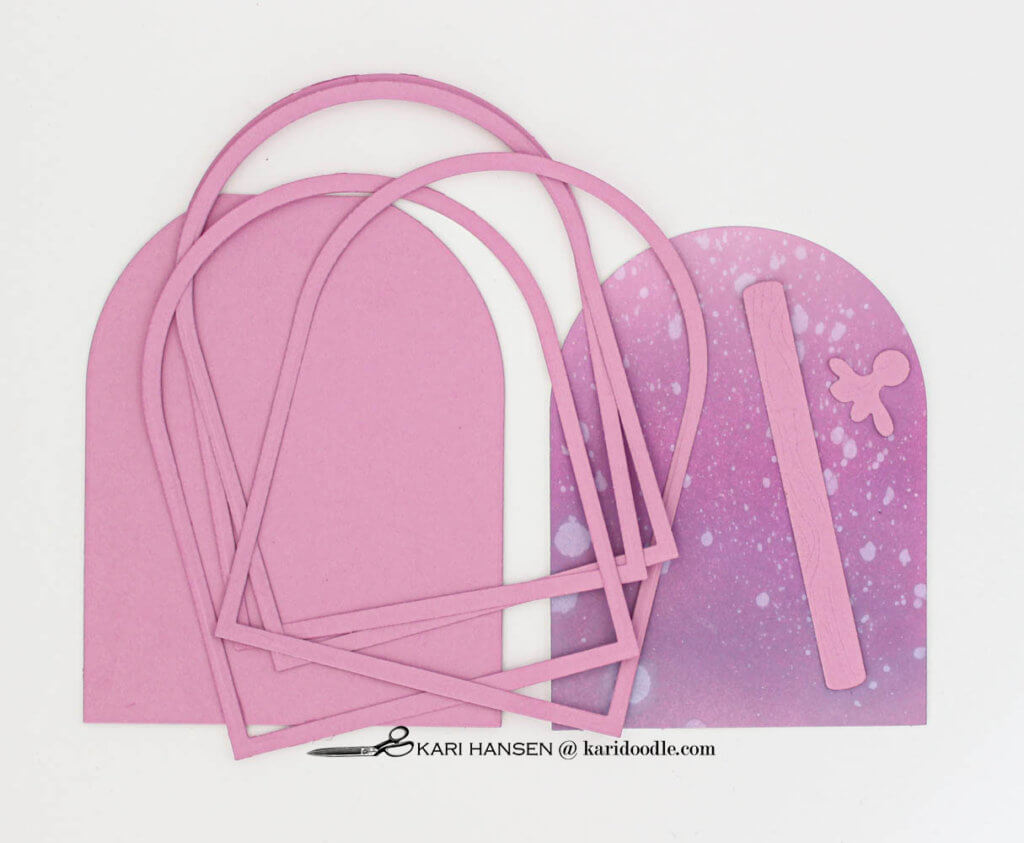
Step #5: Cut and Prepare Card Base and Frame
- For the card base, cut cardstock to 4.5 x 11”. Score and fold lengthwise at the 5.5” mark.
- Place the largest dome die onto the folded card base, positioning the die so the top arch overhangs the fold by about ¼”. Tape in place and run through the die-cutting machine.
- Place the largest and second-largest dome dies together. Center evenly and tape together. Using this die pair, cut four frames from the same cardstock as the card base.
- Stack and adhere the frames together using liquid glue. For best results, first line up the straight edges, then work up the sides to the arch, aligning them with your fingers.
- Die-cut the large wood-grain cloche base twice from the same cardstock as the card base. Do the same for the cloche knob die, but this time cut three pieces. Stack and adhere the die-cut pieces together.
- Attach the stacked dome frame to the front of the card base with liquid glue, lining up the bottom and sides evenly with the shaped card base. The top will overhang the card base slightly.
- Adhere the ink-blended panel by snugging it into the domed frame. If the fit is tight, run your nail along the edge to pop the panel down into the frame.
- Attach the cloche base to the bottom of the card, directly on top of the flat side of the arched frame. Attach the cloche knob to the top of the card.
Step #6: Assemble Card Embellishments
- Arrange the stacked word die-cut, sentiment strip, and stamped plants within the card-front cloche.
- Adhere the word die with liquid glue.
- Place sentiment strip directly under the word die-cut using foam tape.
- Attach the kale and cabbage with foam tape.
- Finish with water droplet jewels.
Level Up: Construct a Trifold Card Base
- Create card base: Cut 2 pieces of cardstock to 4.5 x 11”. Score and fold lengthwise at the 5.5” mark on both pieces.
- Place the largest dome die onto one of the card bases, positioning the die so the top arch overhangs the fold by about ¼”. Tape in place and run through die cutting machine.
- Center second-largest dome die onto the front of that card base. Secure with tape and die cut.
- Place the largest dome die onto the second card base, but this time, position the die so the flat bottom of the dome overhangs the fold by about ¼”. Tape in place and run through die cutting machine.
- Place the largest and second-largest dome dies together. Center evenly and tape together. Using this die pair, cut four frames from the same cardstock as the card base.
- Stack and adhere 3 of the frames together using liquid glue; set aside 4th frame. For best results, first line up the straight edges, then work up the sides to the arch, aligning them with your fingers.
- Die-cut the large wood-grain cloche base twice from the same cardstock as the card base. Do the same for the cloche knob die, but this time cut three pieces. Stack and adhere the die-cut pieces together.
- Die-cut a piece of acetate using the largest dome die.
- Using liquid glue, attach the stacked dome frame to the front of the first card base, on the open dome window, lining up the bottom and sides evenly. The top will overhang the card base slightly. Attach the acetate to the stack, then attach the final frame on top of the acetate, lining it up with the frame stack underneath.
- To attach the two card bases together: line up the back bottom dome shape of the first base with the corresponding shape of the second base. The window flap will open up and away from you, and the bottom flap will open down and towards you. Trim about ¼” off the top of the front fold.
- Open the window flap but close the bottom flap. Adhere the ink-blended panel to the front of the bottom flap. Adhere cabbages with foam adhesive to the lower portion of this panel.
- Attach the cloche base to the bottom of the front window flap card, directly on top of the flat side of the domed frame. Attach the cloche knob to the top of the card.
- Use liquid glue to adhere the word-die stack and sentiment directly to the front of the acetate panel. To cover the adhesive showing through the back of the acetate, die-cut an extra word and blank sentiment strip. Adhere them (backward) to the backside of the acetate.
Doodle tip: Fortify the card base. The cardstocks I used for these cards were the right colors but weren’t as heavy as I usually like for card bases. I prefer #100-110 for sturdy card bases, and these cardstocks were about #60. For traditional card shapes, I would use this lighter weight cardstock only as front panels, adhering them onto a heavier card base in a neutral color. But because of the shaped nature of these cards, I wanted the whole card to be the same cardstock. The remedy is to reinforce the card base with a slightly smaller second layer of matching cardstock. By making the second piece smaller, the hinge will not be impeded.I took the negative shape leftover from cutting one of the arched frames and adhered it to the back of the card base. If you don’t have this kind of die-cut shape to use, trace and cut a piece from the same cardstock that is about ¼” smaller than the closed card and adhere it to the back of the card. For these card bases, I only reinforced the back since the front was fortified when I added the ink-blended panel and stacked dome frame.
Supplies
- Cabbage and Kale stamp and die sets | Power Poppy
- Cabbage Patch digital stamp set | Power Poppy
- Nested Domes die set | Waffle Flower
- Mom and Dad die set | Simon Says Stamp
- Love You die | Simon Says Stamp
- Simple Serif Alphabet die set | Concord & 9th
- Happy Sentiments stamp set | Spellbinders
- Sentiment Strip die set | Pink & Main
- Violet, dark purple, dark green, light pink cardstock
- White cardstock #110 | Neena Solar White Classic Crest
- Watercolor paper | Canson XL
- Clear acetate
- White gel pen #10 | Sakura
- Clear water droplet jewels
- Gansai Tambi watercolor set | Kuretake
- Versafine Black Onyx ink | Tsukineko
- Distress Oxide inks | Ranger: Bundled Sage, Mowed Lawn, Pine Needles (green card); Dusty Concord, Seedless Preserves, Wilted Violet (purple card); Spun Sugar, Tattered Rose, Victorian Velvet (pink card); Milled Lavender, Seedless Preserves, Wilted Violet (violet card)
Tools & Adhesive
- Die-cutting machine | Spellbinders Platinum 6
- Misti stamping platform | My Sweet Petunia
- Scoring board
- Teflon bone folder
- Silver Black Velvet watercolor brushes, round #4, 8, 12
- Distress Sprayer | Tim Holtz for Ranger
- Foam adhesive | Scotch 3M
- Round paint palette, plastic
- Paper trimmer
- Blending brushes | Taylored Expressions
- Precision Craft Glue | Bearly Art
- T-square ruler
- Katana jewel picker
