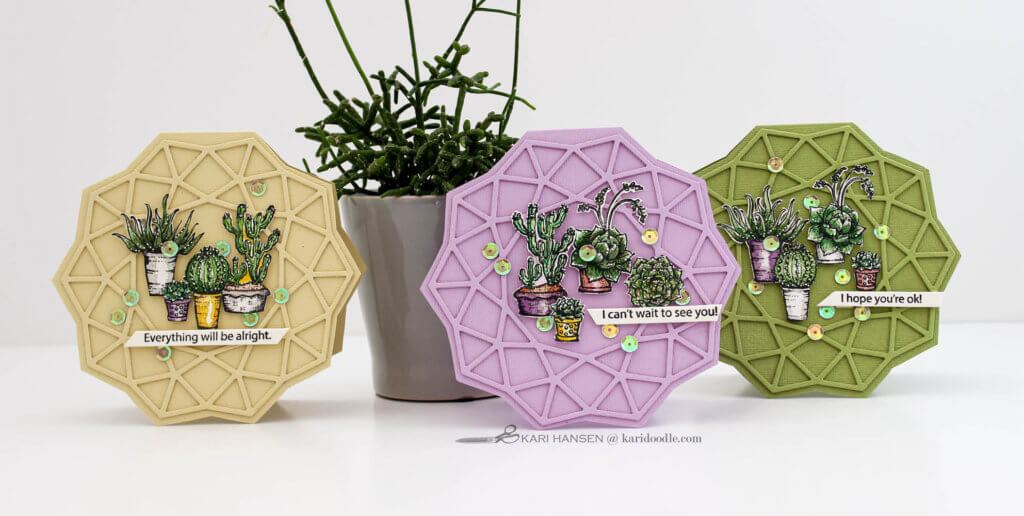
Inside: Step-by-step instructions for crafting uniquely shaped terrarium cards using geometric dies and succulent stamps, with tips for coloring succulents.
What if starfish were armed and dangerous?
If they were, they might look a lot like the leafy creature I’m gazing into, with its barbed, triangular arms radiating from the center. Watch out for prickles!
In contrast, the next one over is completely strokable. Plump and fuzzy, sweet as a lamb’s ear, with an irresistible velvety surface.
And that one over there? Its spindly grasshopper legs and knobby knees make me think of the infamous Ichabod Crane.
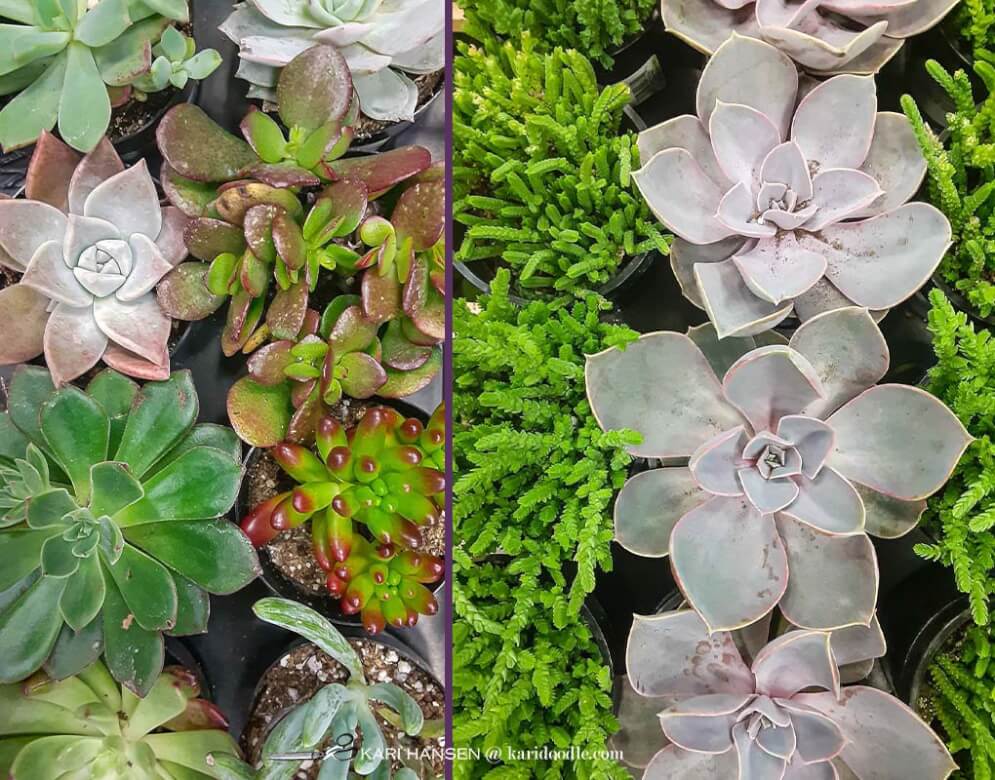
These little succulents, each with a distinct personality, are just a few of the hundreds crowded on the nursery table. Each one tempts with tactile textures, charms with sumptuous shapes, mesmerizes with a myriad shades of greens. Oh, so many greens! From waxy emerald to dusty sage, from shiny malachite to violet-freckled jade.
As we marvel at this assortment of botanical characters, I wonder how we can possibly pick favorites. How will we ever choose which of these spirited succulents to take home?
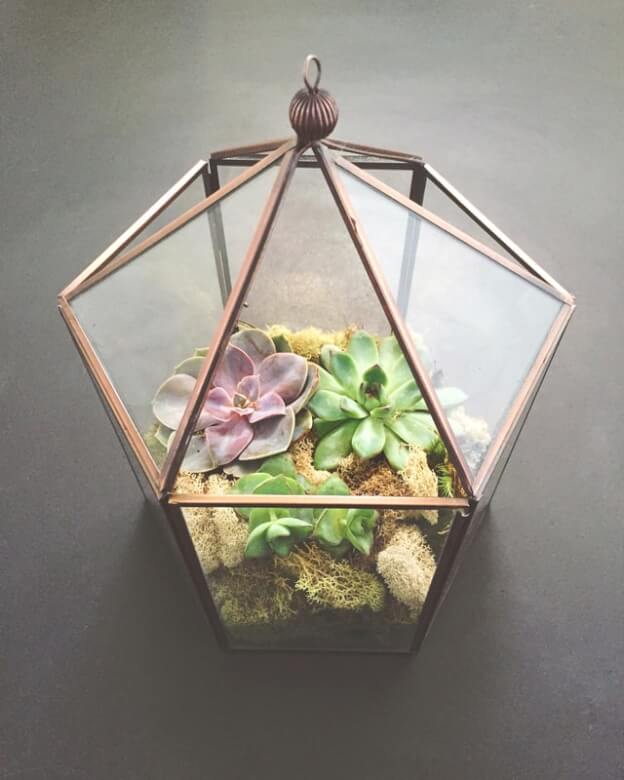
After much fun speculation, we do finally narrow our choices down to a dozen. Once home, we nestle our new flora friends into a planter. While we’re using a simple pot this time, I’ve got my eye on those trendy geometric glass terrariums (like these cuties in brass or these in black metal) for even more quirky plant friends. The succulent’s distinctive shapes will look right at home in the linear structure of those brass-framed vessels.
In this post:
Create Virtual Terrariums for Paper Succulents
Shortly after that trip to the garden center, I ordered the Sassy Succulents stamp set from Power Poppy. This set contains six different succulents, as diverse as the crowd at the nursery. Just like the living plants, these paper versions would look perfect in geometric terrariums. I set out to make cards with virtual terrariums to perfectly house these stamped cuties.
For my cards, I’ve used geometric dies to represent the lines and planes of a glass terrarium. These geo die designs will interpret the 3D angular structure of the real thing into a flat and abstract version, perfect for the 2D format of a card.
Stacking multiple cuts of the same die together gives the design shadows and dimension, defining the linear shapes of the abstract geo patterns even more.
Many kinds of geometric-shaped dies will work for this technique. Look for die designs with line segments intersecting at sharp angles. For my projects, I used three geometric dies from Spellbinders. One is a shape die and the other two are larger background dies.
Make Simple Terrarium Cards with Geo Shape Dies
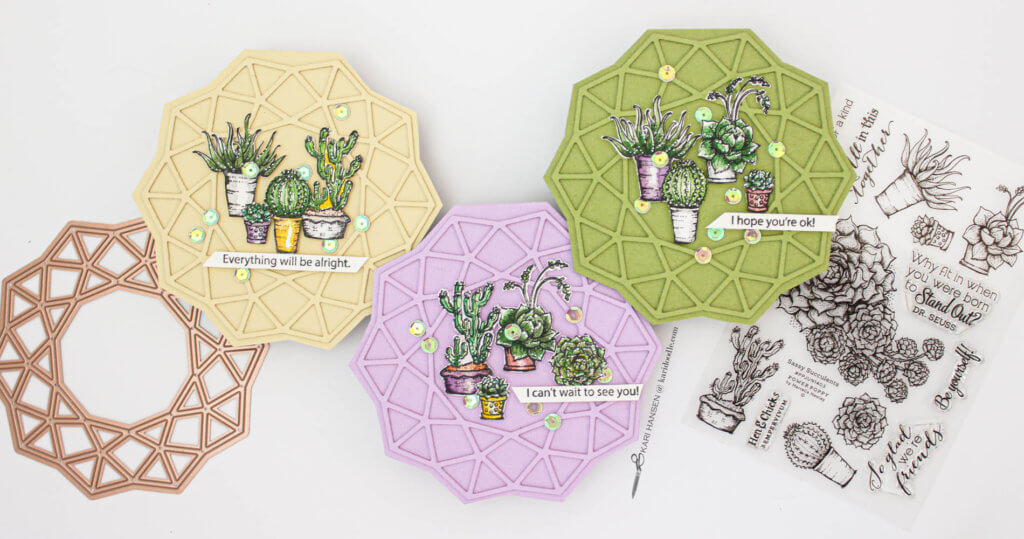
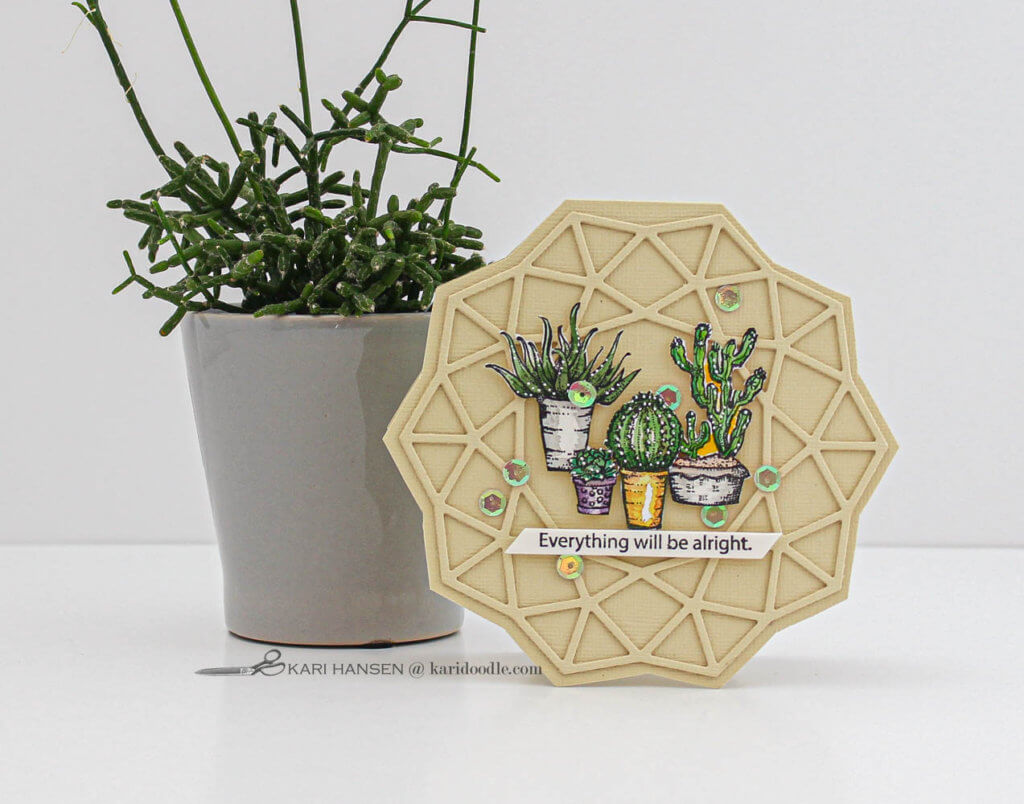
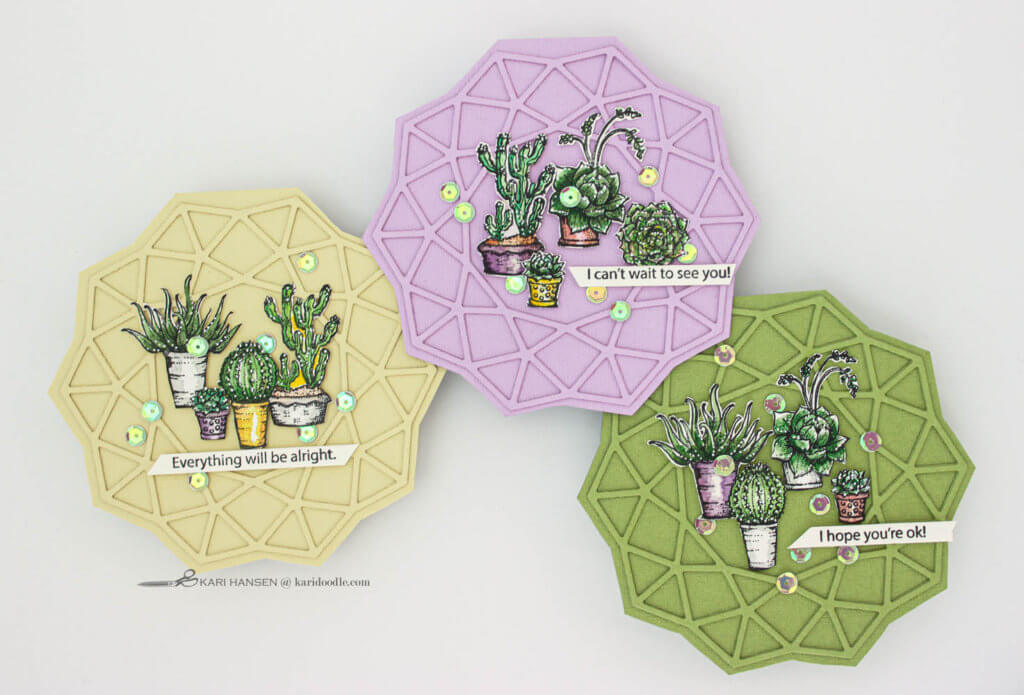
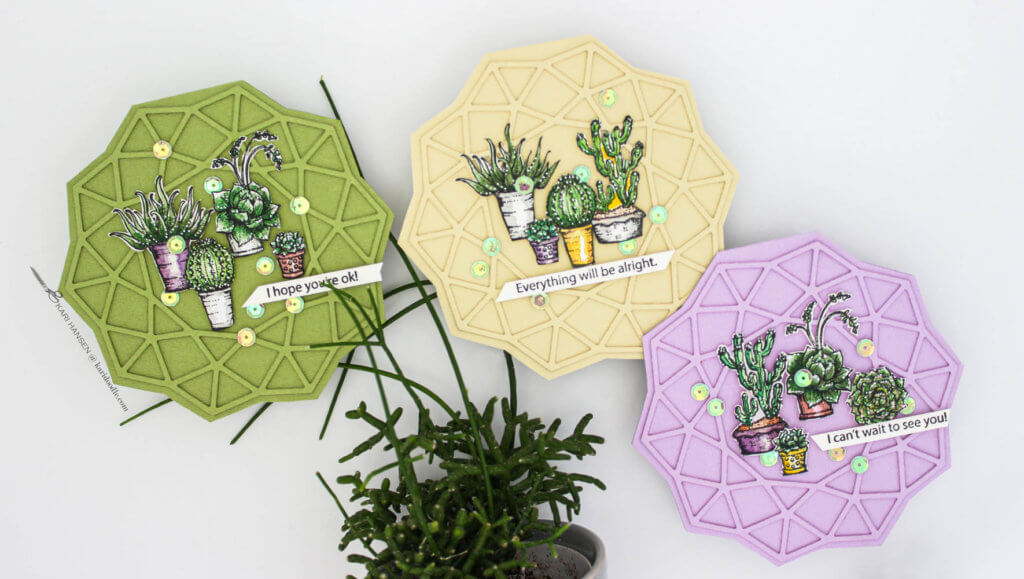
The first die, Geo Flower (Spellbinders), creates a geo pattern in a circular shape, as you can see on the yellow, green, and lavender cards. Using this die creates a simple representation of a top-down view of a glass terrarium.
And because the perimeter of the die is in a distinct shape, it lends itself to making a uniquely shaped card format. Simply use the outer flange of the die as a tracing template to make a folded card base that is slightly larger than the geo die-cut.
You could also use a geo heart, a geo octagon, or other geo shape die for a similar effect. Geo shape dies like these are the simplest way to make an abstract terrarium card.

Construct Custom Terrarium Backgrounds with Large Geo Dies
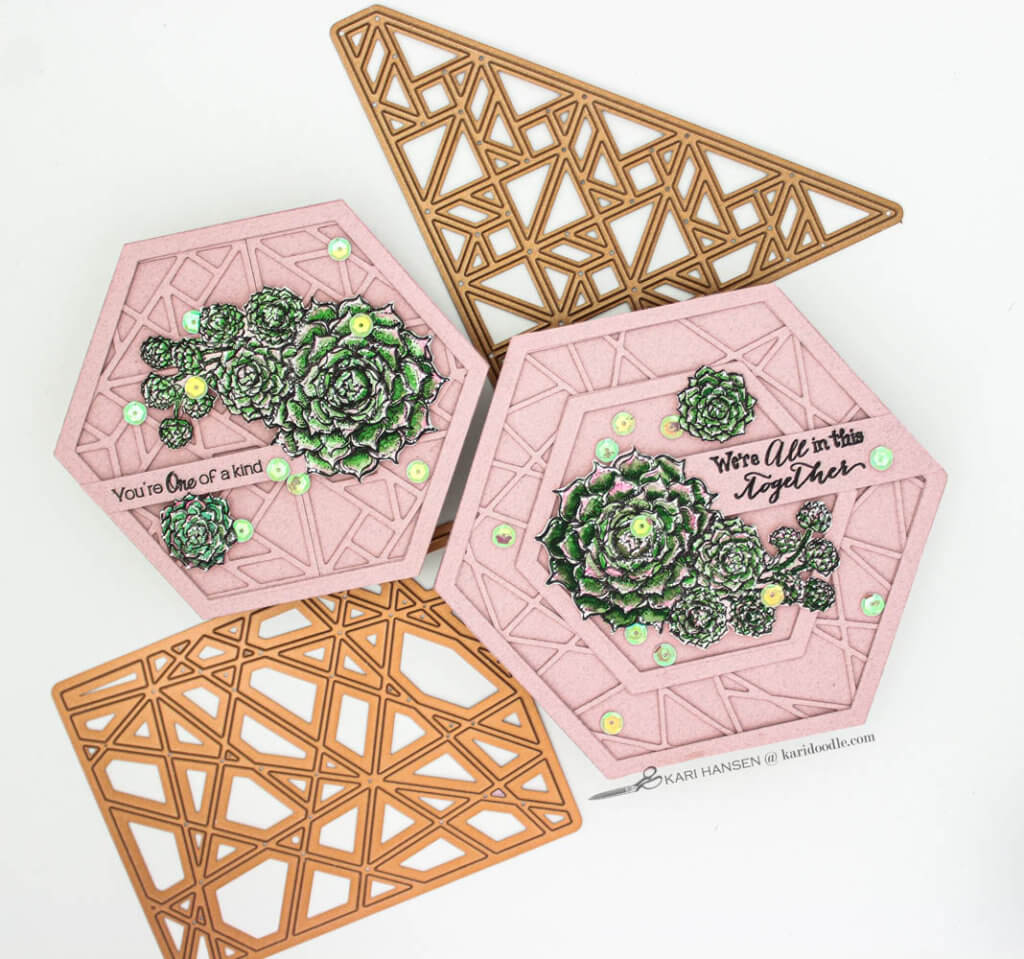
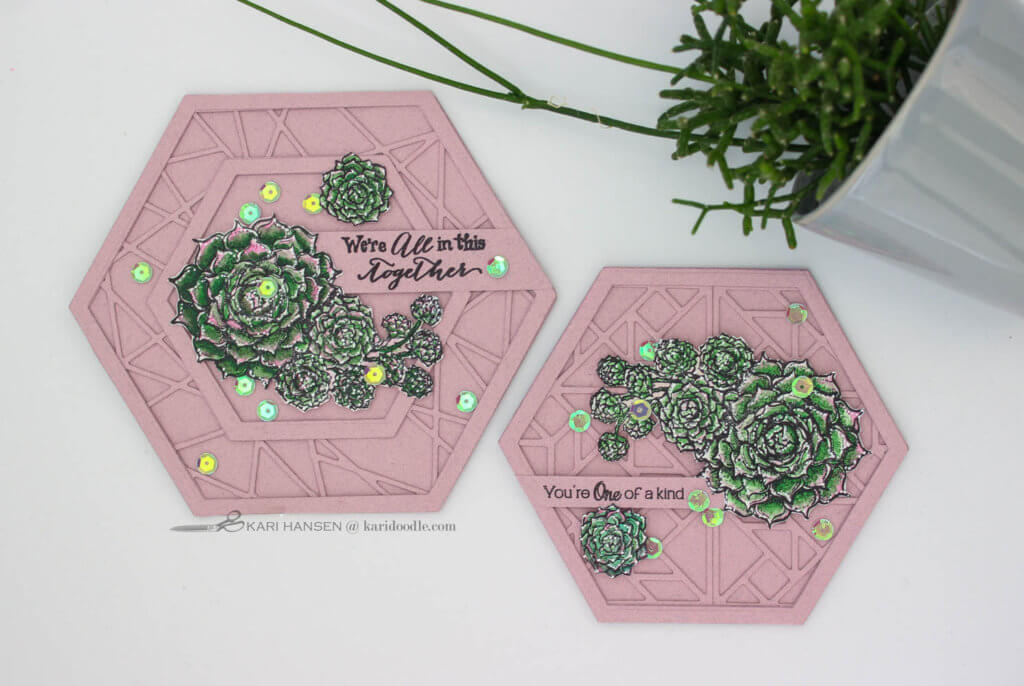
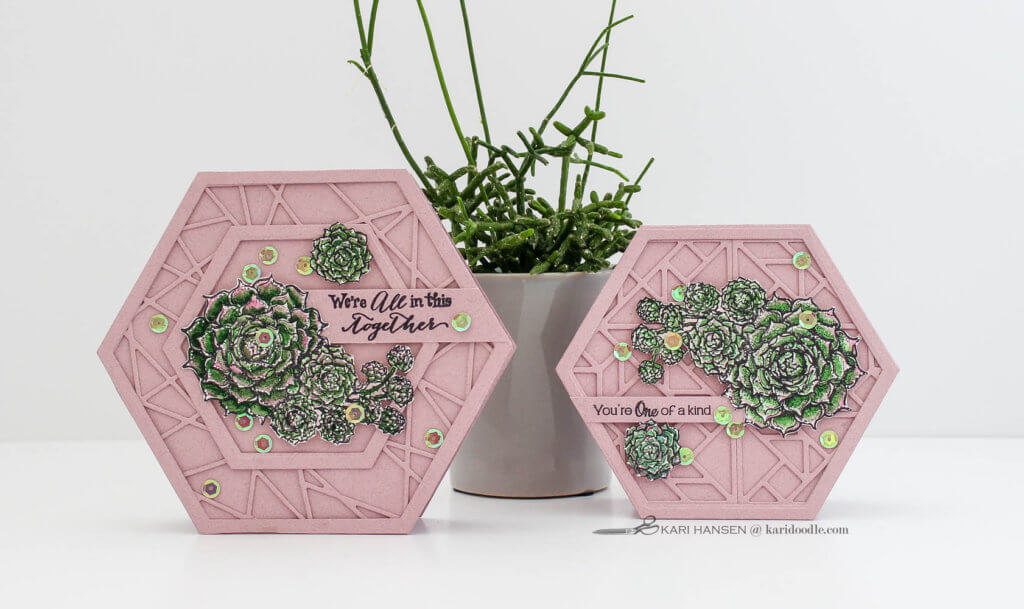
For the mauve hexagon cards, I used two large geo dies to create the abstract terrarium effect. The Geo Steps die (Spellbinders) is triangle-shaped, and the Glass Effects die (Spellbinders) is an A2-sized rectangle. You can substitute any similar geo die with a large pattern area for this kind of terrarium design, including cover-plate dies.
Because I wanted this card pair to also be shaped, I used a nesting hexagon die set (Honey Bee) to create a frame structure to house these bigger geo patterns. Since these hexagon cards are wider than the surface area of the geo dies, I made two die-cut stacks from each die and butted them next to each other to fill the whole card.
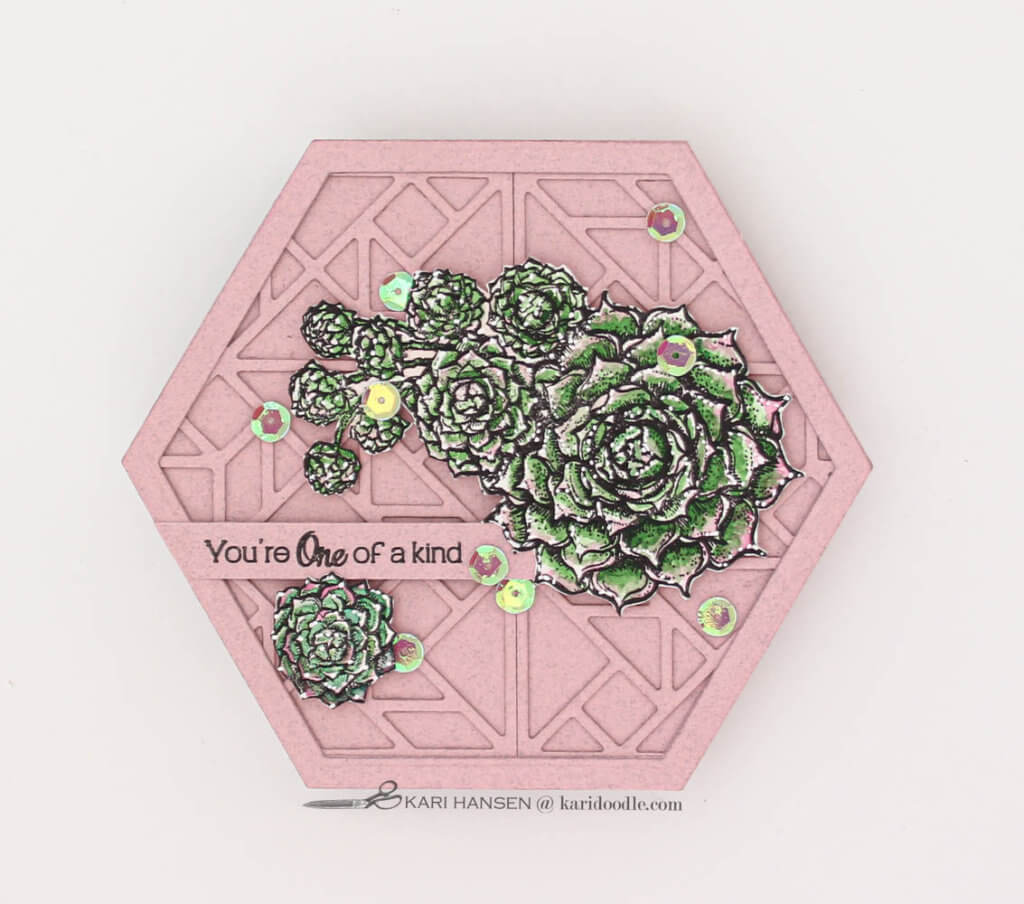
For the smaller hexagon card, I kept all the geo lines intact on the die-cut, including the outer border. I adhered the two die-cut stacks side by side on the hex card front and then placed a stacked frame around the perimeter. Once the die-cut overhang is trimmed off, that outer frame creates a clean edge around the card.
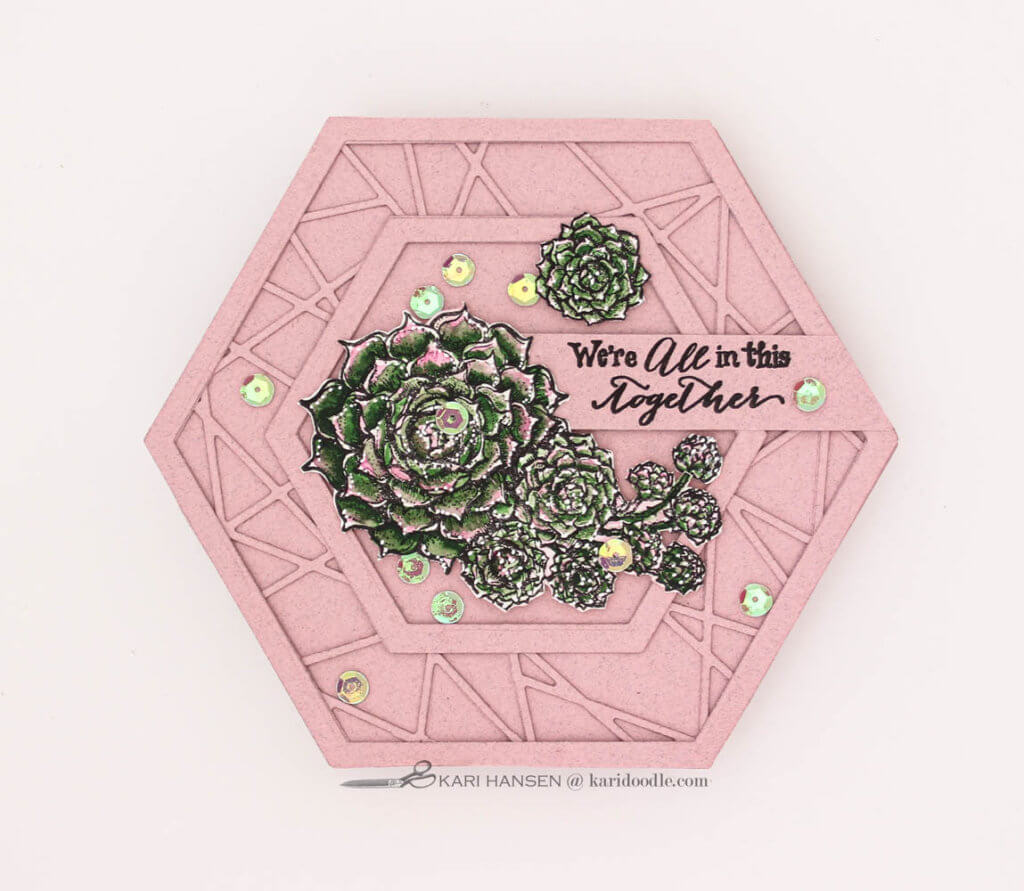
For the larger hexagon card, I trimmed off the outer border of the die stack before I placed them on the card side by side. The result is a seamless look, as if it were one continuous die-cut instead of two placed together.
I made two hexagon frames for the larger card: one the same size as the card base, and the second about 1.5” smaller. I fit the two geo die-stacks together to fill the space created in between the two hex frames, trimming some of the line segments as needed to fit the two sides together snugly and create the best pattern.
See more ideas for uniquely shaped cards: How to Make Sparkling Rose Gold “Thanks a Latte” Cards
5 Tips for Coloring Succulents
I used watercolors (Kuretake Gansai Tanbi) on my little succulents, but you can also use Copic, colored pencils, or any other favorite coloring medium. Whatever medium you choose, here are some tips for coloring the cuties:
- Be adventurous with a wide variety of greens, as well as touches of purple, pink, and yellow, on your flora to make each one distinct.
- Create the effect of roundness and dimension on the pots and plants by keeping a white highlight in the center and making the outer edges the darkest.
- For radial succulents with distinct leaf segments, leave white highlights on the tips of the leaves. Make the innermost part, where the plant would connect, the darkest.
- Use a white gel pen to easily add more highlights as needed and to represent large prickles.
- A white gel pen is also perfect to add in tiny highlights to the leaf tips at the center of radial plants, such as the hen-and-chicks on the mauve cards. Because the center tends to get dark and bit indistinct once it is colored in, some well-placed tiny dots of white can add life and sparkle back into this area.
More Super Succulents Stamps to Try
Here are more succulent stamp sets that would work great for this kind of card design, including a few digital stamps you can download and size however you wish.
Clear polymer stamp sets:
- Succulent Singles clear stamp set, by Power Poppy
- Succulents stamp set, by Waffle Flower
- Succulent Blossoms stamp set, by Picket Fence Studios
- Succulents stamp set, by Altenew
- Succulents stamp set, by Sweet ‘n Sassy
- Succulents rubber stamp set, by Darkroom Door
- Stamp Your Own Succulents stamp set, by Hero Arts
- Sweet Succulents stamp set, by Technique Tuesday
- Succulents stamp and die set, by Art Impressions
Digital stamp sets:
- So Succulent digital stamp set, by Power Poppy
- Hen and Chicks digital stamp set, by Power Poppy
- Wreath: Succulents and Baubles digital stamp set, by Power Poppy
- Succulents digital stamps, by Mujka
- Succulent Line Art, by Carrie Stephens Art
Step-by-Step: Radial Geo Terrarium Cards
- Create card base. Cut cardstock in lavender, moss green, or light yellow-green to 5 x 10”, or about ½-inch wider than the outer edge of die. Using a scoreboard and bone folder, score and fold the cardstock lengthwise at the halfway mark (5” on my 5 x 10” piece of cardstock).
- Shape the card base. Place the Geo Flower die face up on the folded card base, leaving an even 1/4” gap between the top die edge and the card fold (this will create the card’s hinge). Lightly trace around the outer edge of the die’s flange with a pencil. Remove die and cut along pencil line, cutting through both layers of the card base simultaneously but leaving the card fold intact. Erase any visible pencil lines.
- Cut and stack geo dies. Die-cut three pieces of the Geo Flower die from the same cardstock as the card base. Stack and adhere these three pieces together using liquid glue. Adhere the die-cut stack to the front of the card base.
- Stamp and color succulents. Using a waterproof black ink and a stamp positioning tool, stamp the small succulents from the Sassy Succulents set onto watercolor paper. Paint succulents using watercolors and a small round brush. Fussy cut or die-cut around the images.
- Stamp and cut sentiment. Stamp a sentiment using the Everyday Messages stamp set onto ivory cardstock using the same black ink. Cut out the sentiment with scissors or a sentiment strip die.
- Assemble the images. Arrange the stamped images and sentiment strip on the front of card, in the center area of geo die-cut. Once you’re happy with the arrangement, add foam adhesive to the back of all pieces and adhere on the card.
- Finish with sparkle. Place 7-8 sequins around images and sentiment as desired. Using liquid glue and a jewel picker, adhere the sequins to the card.
Love to watercolor stamped images? Check out: How to Make Crazy Cute Critter Cards for Your Kids’ Teachers
Step-by-step: Small Hex Geo Terrarium Card
- Create card base. Cut mauve cardstock to 5.5 x 5.5”. Using a scoreboard and bone folder, score and fold the cardstock lengthwise at the 5.5” halfway mark.
- Shape the card base. Place the 5” hexagon die from the Hexagon Solid Stack set on the folded card base, setting the top die edge to extend slightly past the card fold. This will leave the card’s hinge intact. Tape in place. Run through die-cut machine, making sure the die cuts cleanly through both layers of the card base.
- Cut and stack the hexagon frames. Lay the same hexagon die and next largest together, evenly spaced. Apply tape to keep die arrangement in place. Use this die set to cut two frame pieces from mauve cardstock. Stack and adhere the two frame pieces together.
- Cut and stack geo dies. Die-cut six pieces of the Geo Steps die from the mauve cardstock. Stack and layer three of the pieces together using liquid glue. Repeat with remaining three pieces, resulting in two sets of die stacks. (If you’re using a different geo die that has an overall area wider than the hexagon base, you only need to cut and stack three pieces.)
- Assemble geo background. Arrange both geo die-cut stacks side-by-side on the front of the card base so they fill the area, then adhere. Trim off any overhang around the edges of the card base. Adhere the hexagon frame on top of the geo pieces.
- Stamp and color succulents. Using a waterproof black ink and stamp a positioning tool, stamp the large and small hen-and-chicks succulents from the Sassy Succulents set onto watercolor paper. Paint the succulents using watercolors and a small round brush. Fussy cut or die-cut around the images.
- Stamp and cut sentiment. Stamp a sentiment from the Sassy Succulents set onto mauve cardstock using the same black ink. Cut out sentiment with scissors or sentiment strip die, leaving long ends on the strip.
- Assemble the images. Arrange the stamped images and sentiment strip on the front of card. Once you’re happy with the arrangement, add foam adhesive to the back of all pieces and adhere on the card. Trim outside edge of the sentiment strip to be flush with the card base.
- Finish with sparkle. Place 7-8 sequins around the images and sentiment as desired. Using liquid glue and a jewel picker, adhere sequins to the card.
Step-by-Step: Large Hex Geo Terrarium Card
- Create card base. Cut mauve cardstock to 6 x 12”. Using a scoreboard and bone folder, score and fold the cardstock lengthwise at the 6” mark.
- Shape the card base. Place the largest hexagon die from the Hexagon Solid Stack set on the folded card base, setting the top die edge to extend slightly past the card fold. This will leave the card’s hinge intact. Tape in place. Run through die-cut machine, making sure the die cuts cleanly through both layers of the card base.
- Cut and stack the hexagon frames. Lay the largest and next largest hexagon dies together, evenly spaced. Tape together. Use this die set to cut two frame pieces from mauve cardstock. Repeat same process for smaller pair of hexagons to create a frame set about 1-inch smaller than large frame set. Stack and adhere each of the hexagon frame sets together.
- Cut and stack geo dies. Die-cut six pieces of the Glass Effects die from the mauve cardstock. Stack and layer three of the pieces together using liquid glue. Repeat for other three pieces, resulting in two sets of die stacks. (If you are using a different geo die that has an overall area wider than the hexagon base, you only need to cut and stack three pieces.)
- Assemble geo border. Cut off any border pieces from die stacks. Arrange both geo die stacks side-by-side so they will fill the open area of the large hexagon frame. You may need to snip out some of the cross-pieces in the geo structure to create the best fit. Adhere the large hexagon frame on top of geo pieces. Trim overhang. Adhere small hexagon frame on top, centering it inside the large frame. Once dry, trim overhang from the inside of the small hexagon frame. Adhere entire geo border to the front of card base.
- Stamp and color succulents. Using a waterproof black ink and a stamp positioning tool, stamp the large and small hen-and-chicks succulents from the Sassy Succulents set. Paint succulents using watercolors and a small round brush. Fussy cut or die-cut around the images.
- Stamp and cut sentiment. Stamp sentiment from Sassy Succulents set onto mauve cardstock using same black ink. Cut out sentiment with scissors or sentiment strip die, leaving long ends on the strip.
- Assemble the images. Arrange the stamped images and sentiment strip on the front of the card, inside the small hexagon frame. Once you’re happy with the arrangement, add foam adhesive to the back of all pieces and adhere on the card. Trim outside edge of sentiment strip to be flush with the card base.
- Finish with sparkle. Place 7-8 sequins around the images and sentiment as desired. Using liquid glue and a jewel picker, adhere sequins to the card.
Supplies
- Sassy Succulents stamp set, Power Poppy
- Messages for Everyday stamp set, Simon Says Stamp
- Geo Flower die set, Spellbinders
- Similar: Dazzler Layer die set, Birch Press
- Hexagon Solid Stack dies, Honey Bee Stamps
- Geo Steps die, Spellbinders
- Glass Effects die set, Spellbinders
- Similar: Stained Glass Cover plate die, Honey Bee Stamps
- Similar: Geo Star 2 die, Pinkfresh Studios
- Sentiment strip dies, Pink & Main
- Lavender, moss green, light yellow-green, and mauve cardstock
- Ivory cardstock
- Black waterproof ink, Gina K Amalgam in Obsidian
- Watercolor paints
- Sequins
- White gel pen, Sakura
Tools & Adhesive
- Platinum 6 die cutting machine | Spellbinders
- Misti stamping platform | My Sweet Petunia
- Sewing machine
- Paper trimmer
- Blending brushes | Taylored Expressions
- Heat tool | Wagner
- Photo printer | Epson
- All-in-one laser printer | Brother
- Scoring board
- Teflon bone folder
- Jewel picker | Katana
- Tag punch board | W R Memory Keepers
- Binding edge punch | EK Success
- Grid Transparency | Simon Says Stamp
- Small fine-tipped scissors | EK Success
- Distress Sprayer | Tim Holtz for Ranger
- Twist-Erase 0.5 mechanical pencil | Pentel
- T-square ruler
- Tweezers
- Hole punch
- Mini hole punch
- Black Velvet watercolor brushes, round #4, 8, 12 | Silver
- Watercolor brushes: purple handled round brushes set of 12
- Watercolor brushes: flat and round set of 7 in case
- Watercolor brush: #18/0 short liner
- Round paint palette, plastic
- Ceramic paint palette
- Hardboard
- Foam adhesive | Scotch 3M
- White ½” foam tape | iCraft
- Black ½” foam tape | iCraft
- Precision Craft Glue | Bearly Art
