Inside: Step-by-step instructions to create unique scrapbook and card embellishments with inlaid die-cut florals and Prima Lavender papers.
By the end of a three-episode Offspring* binge, my straightforward scrapbook layout had morphed into a die-cutting fest. The spoils: a stack of intricate, inlaid die-cut roses with the kind of patterned-paper mixology this design geek gets giddy about.
But let’s back up, before I’d converted half a paper pad into a deck of intricate roses, before my glue bottle needed a refill, and before Nina Proudman had delivered four babies and a fluster of angst.*
In this post:
Start with a Scrapbook Page Plan
My project started out simple enough, with a set of beautiful papers and a scrapbook layout sketch.
My supplies were on the minimal side (at least for me), with the lovely Prima Lavender paper collection as the cornerstone. This collection features old-fashioned roses, ledger paper, butterflies, and vintage-style documents– a few of my favorite things. It’s also in a favorite color palette: lavender, petal pink, and rose gold.
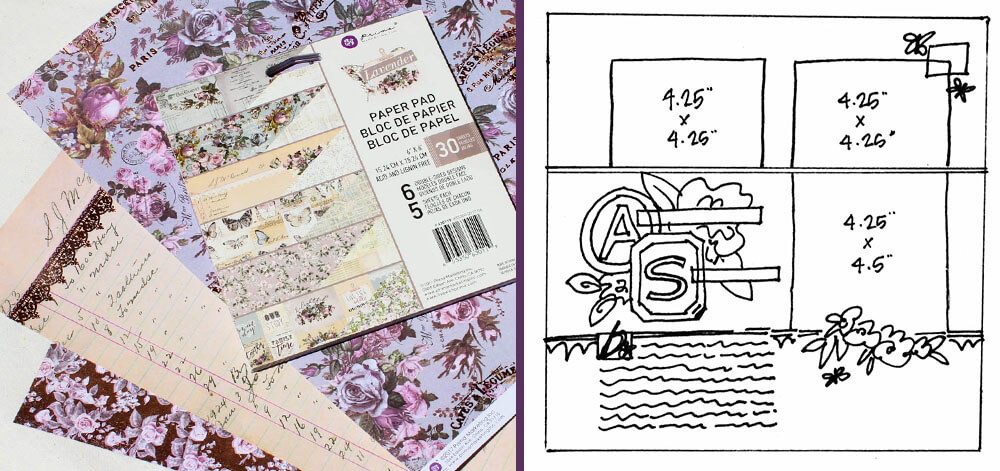
Once I got the foundation of my layout assembled, it was time to construct the dramatic die-cut rose embellishment I was planning to use as a title accent.
Detour to a Die-Cutting Fest
Inspired by the roses repeated throughout the Lavender collection, I pulled the Rosy Summer Flowers die set (Stephanie Low for Spellbinders) from my stash. This two-piece die set contains a large stylized rose outline and shadow background. I started cutting, layering, piecing, and assembling, which was even more fun to do while watching a show.
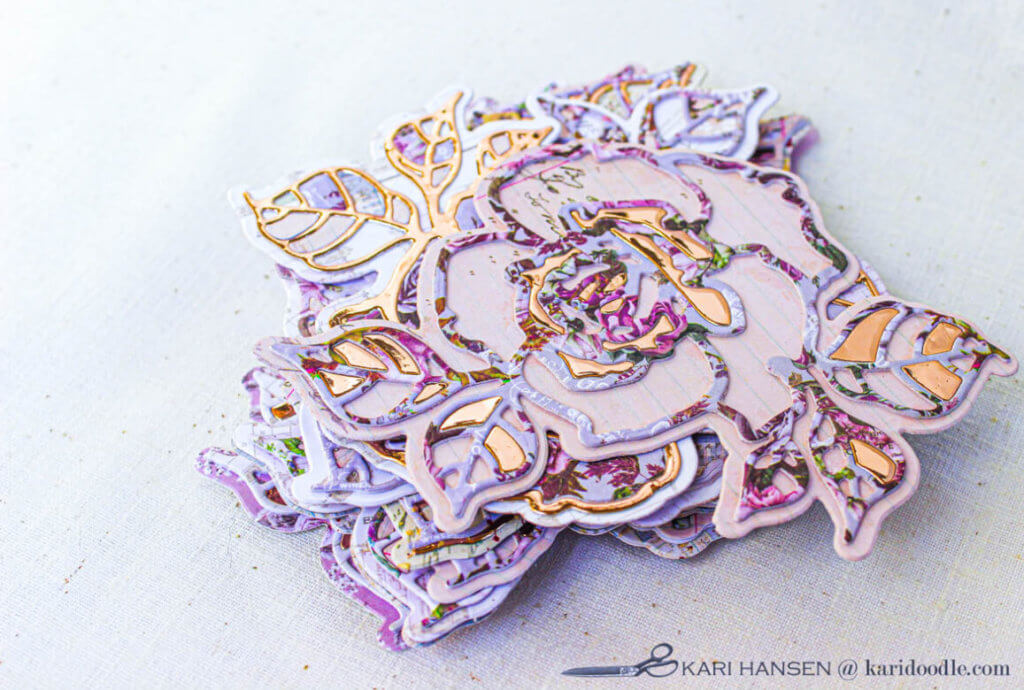
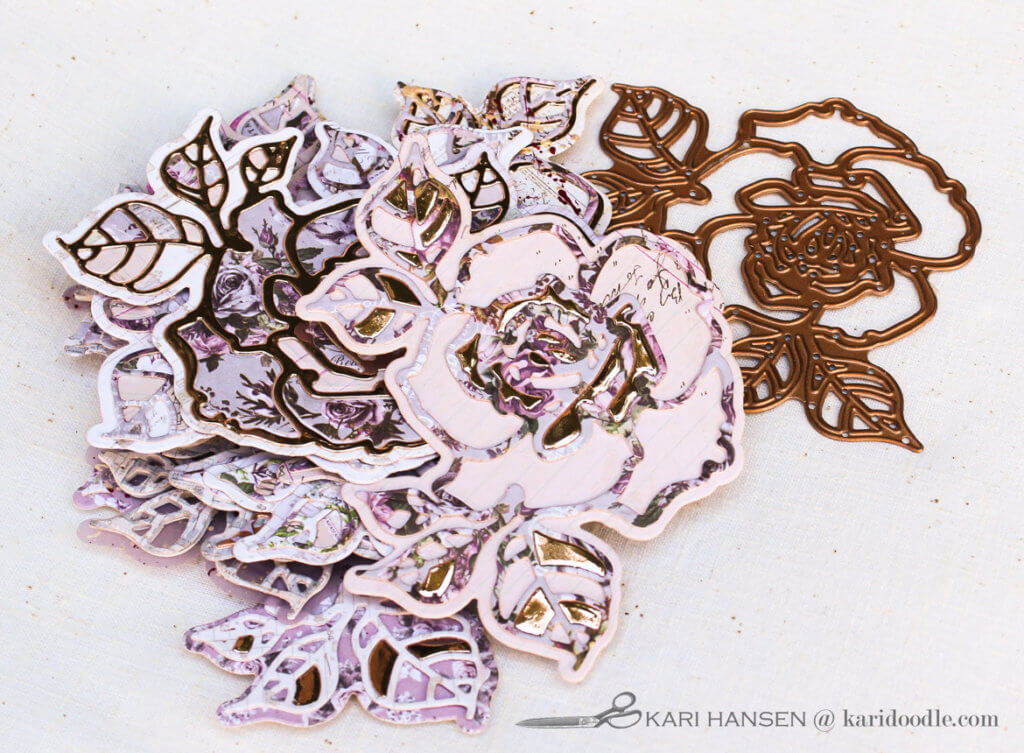
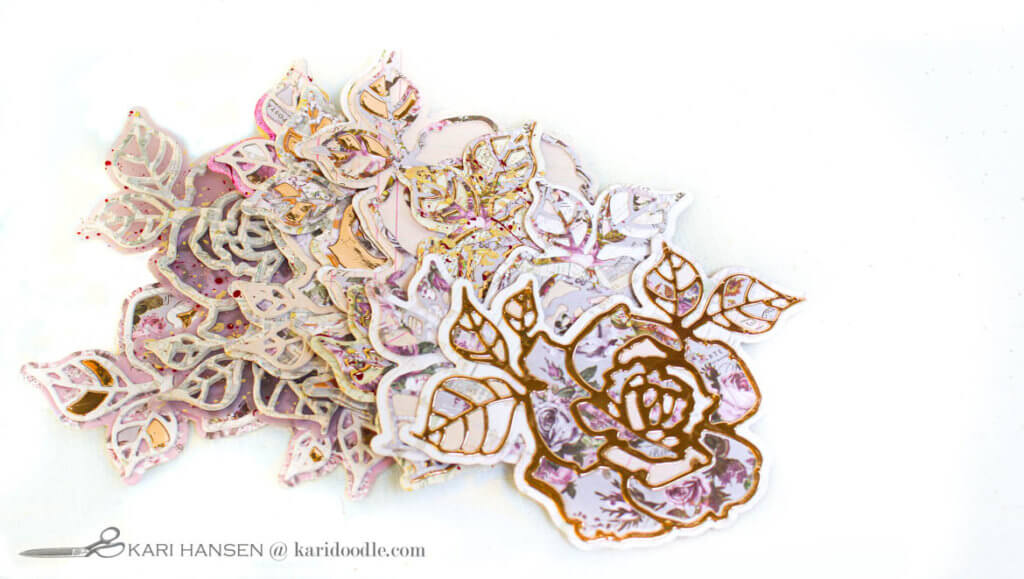
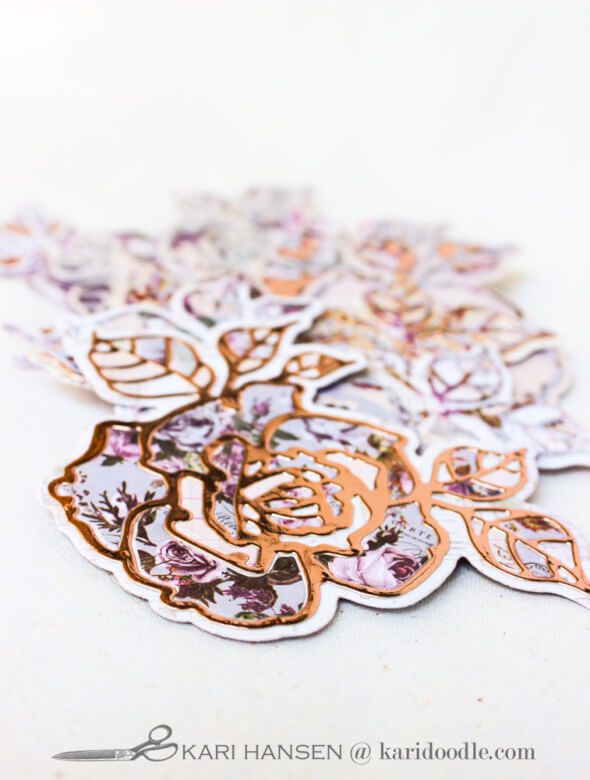
Although I only needed one rose for my layout, I worked on several so I could experiment and see which option would look best on the scrapbook page. Once I got a system on the go, making the inlaid die cuts was kind of addicting. I liked each new one better than the last. I ended up with so many beautiful inlaid pieces — twelve to be exact– I had enough extras to use on a second scrapbook layout and a slew of cards.
The small-scale patterns of the Prima Lavender 6 x 6″ paper pad were perfect for the die cuts. I loved mixing and matching them, along with some rose-gold mirror cardstock (Tonic), in a variety of combinations. I even did a bit of splatter paint and gave colored vellum a try. Which one is your favorite?
The same basic inlay technique applies to all of the variations. Find full instructions towards the end of the post.
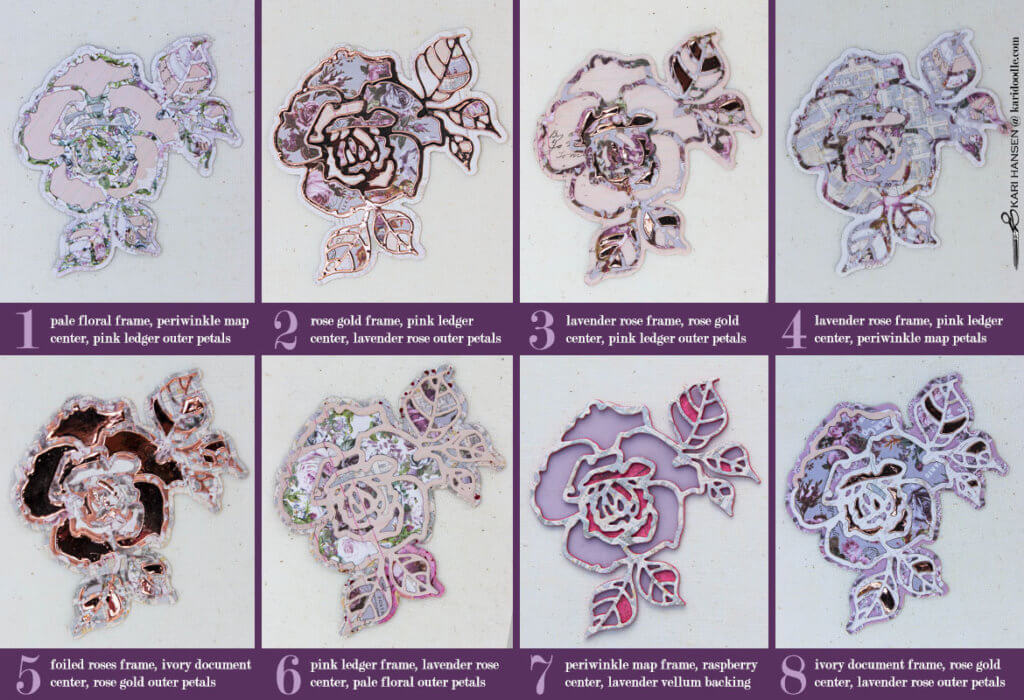
Doodle Tip: Keep contrast in mind when choosing patterned papers for your inlaid die cuts. My most successful pieces had a notable contrast in colors between the frame and the inset pieces. You can see what I mean in example #3, in which the dark lavender frame pops against the light pink ledger paper, or in #2 where the rose gold outline contrasts with the lavender and pink prints. While I like the subtlety of the nearly tone-on-tone quality of #1 and #6, the end result is not as distinctive as the higher contrast combinations.
Finish with a Pretty Scrapbook Page (or Two)
Following my die-cut making session, I got to work on the scrapbook pages.
I made the “Accidental Sabbatical” layout first, following my sketch. When finished, I planned the composition of the second page in a way that would make the most of the remaining 12 x 12″ papers.
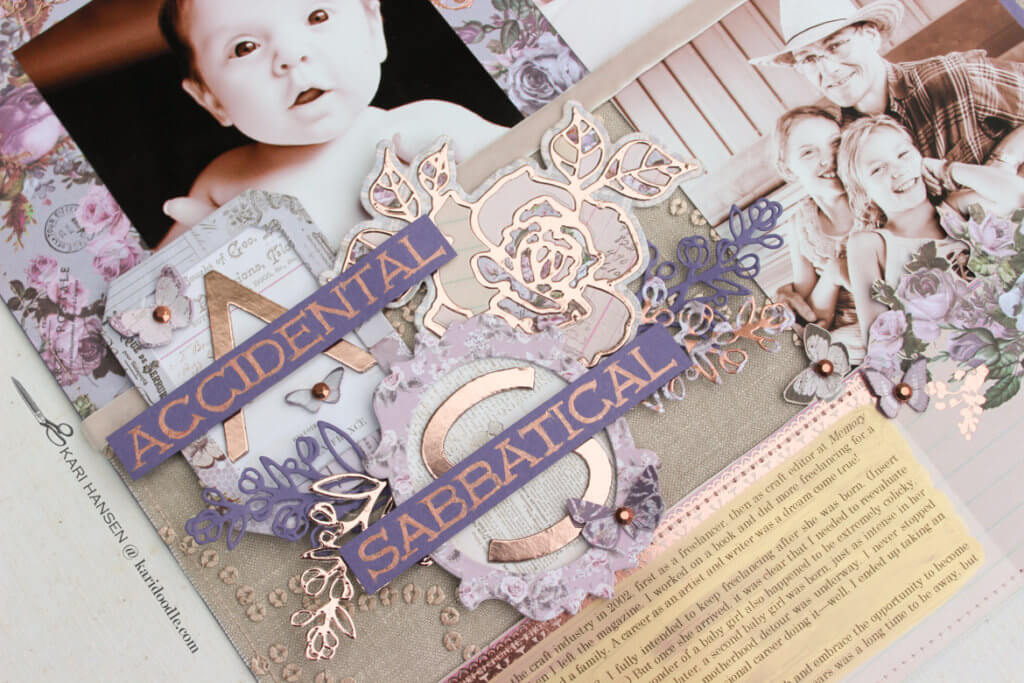
See which rose I used on the second layout and how I changed up that layout design from the first. Here are all the details about the two scrapbook layouts I made with the inlaid die-cut roses and the Prima Lavender Collection papers.
Inlaid Die Cut Technique
Because you’ll want a variety of patterned papers to choose from as you build your inlays, the process is best suited to making three or more die-cut embellishments at a time. You’ll end up with a stack to use on multiple projects, just like I did.
For this technique, you’ll want to choose an outline die that has a variety of separate interior pieces. To do an inlay, you will use the outline part of the die as a frame, and the distinct negative sections as the inlay pieces, fitting them into each section of the frame.
I used liquid glue, such as Ranger Multi Matte Medium or Gina K. Connect glue, to assemble all aspects of the die-cut inlays. The liquid glue gives you enough time to fit the pieces into place but still dries quickly and firmly.
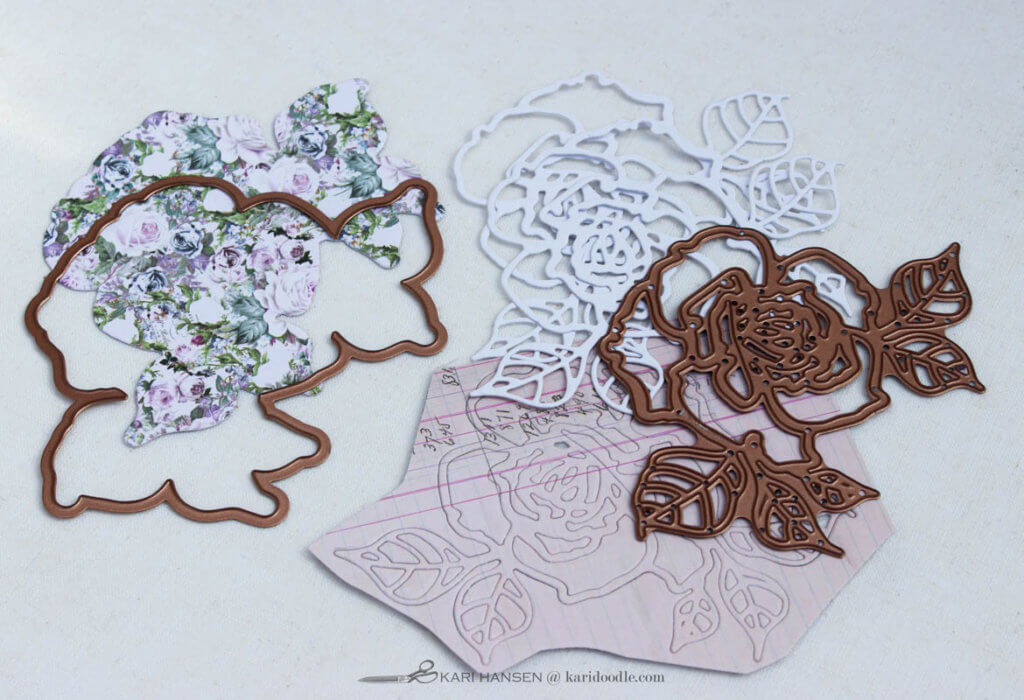
Doodle Tip: Use Press ‘n Seal to keep the negative pieces of the die cuts together. This step makes piecing the inlays together SO MUCH EASIER! Otherwise, the pieces get out of order, which makes assembling the inlays a bit of a puzzle. I tried it both ways, and all I can say is: Get yourself some Press ‘n Seal on the double!
Encore with a Stash of Cards
During another round of Offspring, and I made a whole mess of cards with the remaining twelve inlaid roses. The leftover butterflies and phrase tiles were put to work here, too. When I was finished, only a few tiny scraps remained of the Prima Lavender collection. As a recovering paper hoarder, I like that I was able to use it all up in the course of creating these projects rather than stash away a few random pieces of residual paper.
(COMING SOON) Go to this post to for lots of card ideas using the rest of the inlaid rose die-cuts and Prima Lavender collection.
Two binge sessions of Offspring, two layouts, and twelve cards later, I had tons of fun creating the inlaid die cuts. I love the mix of patterns, the process of picking and fitting each little puzzle piece, and the cohesion of the finished pieces. Yes, my sortie into inlaid rose die-cuts went as long and deep as Billie’s romance with Mick throughout Offsping‘s story arc.* No doubt it will not be my last foray either, with inlays or with Offspring. Give them both a try, and I hope you enjoy them both as much as I did!
*OFFSPRING: The best television show you might never have heard of. This Australian comedy-drama follows Nina Proudman, a smart, compassionate, and quirky obstetrician as she navigates her messy modern life, surrounded by a hilarious cast of family, friends, and co-workers. Very few TV shows can elicit this level of both laughs and tears from me! The first season starts a little slowly, but once it hits its stride this show is totally brilliant and addictive. Find Offspring on Netflix.
Step by Step: Inlaid Die Cuts
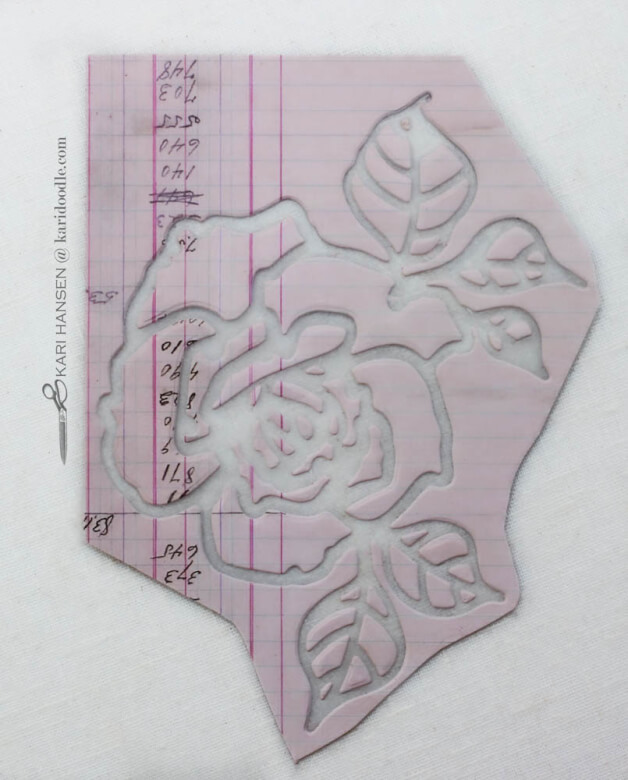
- Cut the shadow die from three patterned papers. If your die set does not contain a shadow or solid background: see step 8.
- Cut the outline die from another patterned paper. But wait! Before you remove the die from the paper, use Press and Seal in the next step to keep the negative pieces together.
- Have a piece of Press ‘n Seal ready, slightly larger than the outline die. After cutting, remove the die-cut sandwich from your cutting machine and turn it upside down. Remove the bottom plate. Place the piece of Press ‘n Seal, sticky side down, onto the back of the die cut. Gently burnish the cut areas to get a good grip. Turn the paper and die-cut over, then gently peel the die away from the Press ‘n Seal, using a pick as needed. Some of the tinier pieces may move around, but with some care, they will still stay on the Press ‘n Seal rather than go astray.
- Repeat steps 3 and 4 from two more patterned papers or from mirrored cardstock.
- Cut outline die 3 times from white or pink cardstock. You do not need to save the negative shapes from the white or pink cardstock die-cuts.
- Stack and adhere the patterned paper outlines on top of the white or pink cardstock outlines. (Because of its thickness, I did not stack the mirror cardstock with white cardstock.)
- Adhere each stacked patterned-paper outline to a shadow die-cut background.
- If your die set does not contain a shadow or solid background: Glue the outline die-cut to a background paper. Once dry, carefully out background paper following the exterior shape of the outline die. You can either cut the background paper right up to the edge of the outline die, or leave a narrow border around the perimeter to mimic the look of a shadow die.
- Using the three sets of negative cuts and a pair of tweezers, place the negative pieces into the outline pieces as desired. Play around with various combinations before you commit to gluing the pieces in place. Leave some spaces open, and alternate patterns throughout the embellishments.
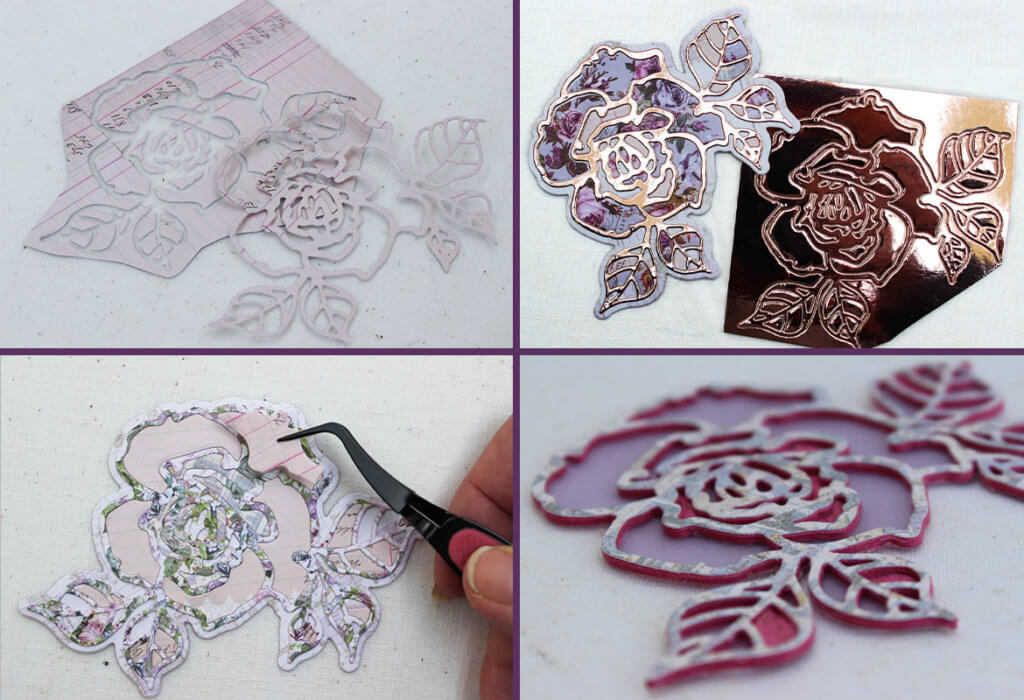
Doodle Tip: The inlay design worked particularly well when I filled the central area of the rose with one pattern and the larger, outer petals where another pattern. To inlay the leaves, choose a third pattern or a combination of the first two.

Supplies
- Lavender 6 x 6′ paper pad, Prima
- Similar: For Her Collection: The Paper Boutique 12 x 12″ and 6 x 6″ paper pads
- Lavender Collection: Constantly Growing with You 12 x 12′ patterned paper, Prima
- Similar: Misty Rose Collection: The Untold Story 12 x 12″ patterned Paper, Prima
- Painted Garden Collection: raspberry pink 12 x 12″ patterned paper, K & Company
- Rose gold mirror cardstock, Tonic
- Rosy Summer Flowers die set, Stephanie Low for Spellbinders
- Lavender vellum
- White cardstock #110
- Dark pink cardstock
- Quinacridone Magenta acrylic paint, Liquitex Basics
- Rose Gold Opal Magic acrylic paint, Art Alchemy by Prima
Tools
- Multi Matte Medium, Ranger
- Die-cutting machine, Spellbinder Platinum 6
- Tool ‘n’ One, Spellbinders
- Press ‘n Seal, Glad
- Scissors
- Paper trimmer, Tonic
- Tweezers

2 comments
These would be so beautiful for DIY wedding invitations! I love them. You have a true gift. ((BTW, found you via @heykristiehill 🙂 )
Thank you, Bobette!